DIY 3D Wall Art Ideas to Transform Your Space
DIY 3D wall art is a fun, affordable way to add depth, personality, and wow factor to any room. With simple materials and a little creativity, you can craft stunning dimensional pieces that reflect your style—no professional skills required.
Key Takeaways
- DIY 3D wall art is budget-friendly: Most projects use affordable or recycled materials like cardboard, wood scraps, or fabric.
- It adds visual depth and texture: Layered elements create shadows and movement, making walls feel dynamic and alive.
- Perfect for renters and homeowners alike: Many designs use removable adhesives, so you won’t damage walls.
- Customizable to any style: From boho and modern to rustic and minimalist, 3D art fits every aesthetic.
- Great for small spaces: Vertical art draws the eye upward, making rooms feel larger and more open.
- Encourages creativity and mindfulness: Crafting your own art can be a relaxing, rewarding hobby.
- Easy to update seasonally: Swap out pieces for holidays or mood changes without a full redecorating overhaul.
Quick Answers to Common Questions
What is 3D wall art?
3D wall art is decorative artwork that extends outward from the wall, creating depth, texture, and shadow. Unlike flat paintings, it adds a sculptural, dimensional element to your space.
Is DIY 3D wall art difficult to make?
Not at all! Most projects use simple techniques and beginner-friendly materials. With basic crafting skills and patience, anyone can create beautiful 3D art.
Can I make 3D wall art if I’m renting?
Yes! Use removable adhesives like Command strips or lightweight hanging systems that won’t damage walls. Many 3D pieces are light enough to hang without nails.
What’s the best material for beginners?
Cardboard and foam board are ideal for beginners—they’re cheap, easy to cut, and lightweight. Start with these before moving to wood or metal.
How do I prevent my 3D art from looking messy?
Plan your design first, use clean cuts, and paint edges neatly. Group similar colors or shapes together for a cohesive, polished look.
📑 Table of Contents
- Why DIY 3D Wall Art Is the Ultimate Decor Upgrade
- Materials You’ll Need for DIY 3D Wall Art
- Top DIY 3D Wall Art Ideas to Try at Home
- Step-by-Step Guide: Making a Simple 3D Wall Hanging
- Tips for Hanging and Styling Your 3D Art
- Why DIY Beats Buying: The Hidden Benefits
- Conclusion: Your Walls Deserve More Than Flat
Why DIY 3D Wall Art Is the Ultimate Decor Upgrade
Let’s be honest—flat, boring walls are a design crime. Whether you’re living in a tiny apartment, sprucing up a rental, or just craving a fresh vibe, DIY 3D wall art is one of the easiest ways to make a big impact. Unlike traditional paintings or prints, 3D art pops off the wall, creating shadows, layers, and a sense of movement that flat decor simply can’t match.
The best part? You don’t need to be an artist or spend a fortune. With a few basic supplies—like cardboard, foam board, paint, glue, and maybe some wood—you can create stunning, gallery-worthy pieces that reflect your personality. Plus, making your own art is incredibly satisfying. It’s creative, therapeutic, and gives your space a one-of-a-kind touch that store-bought decor just can’t replicate.
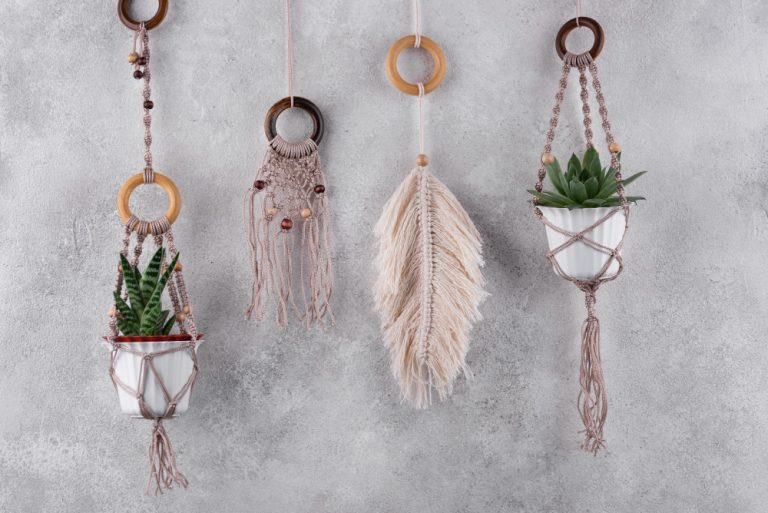
Materials You’ll Need for DIY 3D Wall Art
Before diving into projects, it helps to stock up on versatile, easy-to-find materials. The beauty of DIY 3D wall art is that many supplies are inexpensive or even free if you repurpose household items.

Visual guide about DIY 3D Wall Art Ideas to Transform Your Space
Image source: architectureartdesigns.com
Essential Supplies
- Cardboard or foam board: Great for lightweight, layered designs like geometric shapes or floral motifs.
- Wood slices or plywood scraps: Perfect for a natural, rustic look. You can find these at craft stores or cut your own.
- Acrylic paint and brushes: Use bold colors or soft neutrals depending on your room’s palette.
- Hot glue gun or strong adhesive: Essential for attaching layers securely.
- Scissors, craft knife, or saw: For cutting shapes and materials to size.
- Sandpaper: Smooths rough edges, especially on wood pieces.
- Removable adhesive strips or hooks: Ideal for renters who want to avoid nail holes.
Bonus Items for Extra Flair
- Fabric scraps or felt for soft textures
- Mirror tiles for reflective shine
- Twine or rope for boho vibes
- LED string lights for a glowing effect
- Old magazines or book pages for decoupage
Pro tip: Visit dollar stores, thrift shops, or your recycling bin before buying new. You’d be surprised what can become art!
Top DIY 3D Wall Art Ideas to Try at Home
Ready to get crafting? Here are five creative and beginner-friendly DIY 3D wall art projects that will instantly elevate your space.

Visual guide about DIY 3D Wall Art Ideas to Transform Your Space
Image source: architectureartdesigns.com
1. Layered Geometric Wall Sculpture
This modern piece uses overlapping circles, triangles, or hexagons to create a bold, abstract look. Start by cutting shapes from foam board or cardboard in varying sizes. Paint each piece in complementary colors—think deep navy, mustard yellow, and white. Then, layer them using foam adhesive dots or small wooden blocks to create depth. Arrange them in a cluster on the wall for a dynamic focal point above a sofa or bed.
Tip: Use a ruler and pencil to trace consistent shapes, and sand edges for a clean finish.
2. 3D Paper Flower Wall Art
Bring nature indoors with oversized paper flowers that bloom right off your wall. Use colorful cardstock to cut petal shapes, then curl and layer them around a central bud. Attach each flower to the wall with a small foam spacer so it lifts slightly. Group them in a bouquet-style arrangement for a whimsical, boho-chic vibe.
Tip: Mix flower sizes and colors for a more organic look. Add a few green leaves for extra realism.
3. Wood Slice Tree Silhouette
For a rustic, nature-inspired piece, create a tree using wood slices and branches. Glue small wood rounds in a trunk-and-branch pattern onto a larger backing board. Paint the background in a soft sky blue or forest green, then leave the wood natural or stain it lightly. Hang it in a bedroom or entryway for a calming, earthy feel.
Tip: Collect fallen branches from your yard or ask a local tree service for scraps.
4. 3D Quote or Word Art
Turn an inspiring word like “Breathe,” “Home,” or “Joy” into a dimensional statement piece. Cut letters from wood or thick cardboard, then paint them in a bold color. Attach each letter to the wall with spacers so they float slightly off the surface. The shadows add drama and make the word pop.
Tip: Use stencils for perfect letter shapes, or hand-letter for a personal touch.
5. Mirror Mosaic Wall Art
Combine function and flair with a mosaic of small mirror tiles. Arrange them in a sunburst, heart, or abstract pattern on a painted board. The reflective surfaces bounce light around the room, making it feel brighter and more spacious. Perfect for small apartments or dimly lit corners.
Tip: Use safety-backed mirror tiles and wear gloves when handling sharp edges.
Step-by-Step Guide: Making a Simple 3D Wall Hanging
Let’s walk through a quick project so you can see how easy it is to create your own DIY 3D wall art. This hanging mobile-style piece uses twine, wooden beads, and painted shapes—perfect for a nursery, balcony, or reading nook.

Visual guide about DIY 3D Wall Art Ideas to Transform Your Space
Image source: themegamom.com
What You’ll Need
- Wooden dowel or stick (about 12 inches long)
- Twine or cotton rope
- Wooden beads (various sizes)
- Cardboard or lightweight wood for shapes (stars, moons, hearts)
- Acrylic paint
- Hot glue gun
- Scissors
Instructions
- Paint your cardboard shapes and let them dry completely.
- Cut four pieces of twine, each about 18 inches long.
- Tie one end of each string to the wooden dowel, spacing them evenly.
- On each string, thread wooden beads and glue them in place for weight and balance.
- Attach a painted shape to the bottom of each string using hot glue.
- Tie a loop at the top of the dowel for hanging.
- Hang on a wall hook or nail, adjusting lengths so the shapes hang at different levels.
This project takes under an hour and costs less than $10. Plus, it’s lightweight and safe for renters!
Tips for Hanging and Styling Your 3D Art
Creating the art is only half the fun—displaying it properly makes all the difference. Here’s how to hang and style your DIY 3D wall art like a pro.
Choose the Right Spot
Look for a blank wall that needs personality—above a bed, sofa, console table, or doorway. Avoid cluttered areas where the art might get lost. A single large piece or a curated cluster can become a stunning focal point.
Mind the Height
Hang art so the center is at eye level—about 57 to 60 inches from the floor. This is the standard gallery height and ensures your piece is seen and appreciated.
Use the Right Hardware
For lightweight pieces, use removable adhesive strips like Command™ hooks. For heavier items, use wall anchors and screws. Always check the weight limit and test the hold before hanging.
Create Balance with Other Decor
Let your 3D art shine by keeping nearby decor simple. Avoid hanging it next to busy patterns or too many small frames. A few well-placed plants, a sleek mirror, or a single shelf can complement without competing.
Play with Lighting
Spotlight your art with a small LED light or position it where natural light hits. The shadows from 3D elements change throughout the day, adding movement and interest.
Why DIY Beats Buying: The Hidden Benefits
Sure, you could buy a 3D wall sculpture online—but making it yourself offers rewards that go beyond decor.
First, it’s eco-friendly. Repurposing materials reduces waste and gives new life to old items. Second, it’s cost-effective. Most projects cost under $20, compared to $50–$200 for store-bought equivalents. Third, it’s personal. Your art tells a story—whether it’s a flower from your garden, a quote that inspires you, or a color that matches your mood.
Plus, crafting reduces stress. The focus required to cut, paint, and assemble can be meditative. Many people find DIY projects help with anxiety and boost creativity. And when you hang something you made with your own hands? That pride is priceless.
Conclusion: Your Walls Deserve More Than Flat
Gone are the days of plain, lifeless walls. With DIY 3D wall art, you can transform any space into a personalized, visually rich environment—no interior designer required. Whether you’re crafting geometric shapes, paper flowers, or floating word art, the process is joyful and the results are stunning.
So grab your glue gun, unleash your creativity, and start building. Your walls are ready to pop.
🎥 Related Video: 🏠 AFFORDABLE HOME DECOR • WALL ART DUPES
📺 Tiffany Gemmer – DIY Design
10 budget friendly DIY Wall art decor pieces, including some high end dupes (Pottery Barn, Crate & Barrel, and McGEE & Co).
Frequently Asked Questions
Can I use recycled materials for 3D wall art?
Absolutely! Cardboard boxes, old picture frames, fabric scraps, and even plastic bottles can be transformed into unique 3D art. Recycling adds character and reduces waste.
How do I secure heavy 3D wall art?
Use wall anchors, sturdy screws, or French cleats for heavy pieces. Always check the weight limit of your hanging hardware and distribute weight evenly.
What rooms are best for 3D wall art?
Living rooms, bedrooms, hallways, and home offices are great spots. Avoid high-moisture areas like bathrooms unless the art is sealed and waterproof.
Can kids help make 3D wall art?
Yes! Simple projects like paper flowers or painted shapes are safe and fun for kids. Supervise when using hot glue or sharp tools.
How often should I update my 3D wall art?
It’s up to you! Some people change art seasonally, while others keep pieces for years. Rotate art to refresh your space without a full redecoration.
Where can I find inspiration for 3D wall art designs?
Check Pinterest, Instagram, and YouTube for endless ideas. Look at nature, architecture, and modern art for creative inspiration you can adapt at home.