Montessori toy storage ideas that bring calm to chaos
Montessori toy storage isn’t just about tidiness—it’s about creating a peaceful, accessible environment where kids can explore independently. With thoughtful organization, you can turn cluttered playrooms into serene spaces that support learning and creativity.
If you’ve ever walked into your child’s playroom and felt your shoulders tense at the sight of scattered blocks, stuffed animals, and puzzle pieces—you’re not alone. Playtime is joyful, but the aftermath can feel like a tornado hit. That’s where Montessori toy storage ideas come in. They’re not about perfection or Pinterest-worthy shelves. Instead, they’re about creating a space that feels calm, organized, and respectful of your child’s growing independence.
The Montessori method, developed by Dr. Maria Montessori, emphasizes child-led learning, freedom within limits, and a prepared environment. When it comes to toy storage, this means designing spaces that children can navigate on their own. No more calling for help to find a puzzle piece or stepping on a rogue LEGO. With the right storage solutions, kids can access toys easily, play meaningfully, and clean up without frustration. The result? Less stress for parents and more confidence for little ones.
Let’s be real—no one wants to spend hours organizing toys every day. But with a few smart, Montessori-inspired changes, you can create a system that works for your family. The goal isn’t to eliminate mess entirely (because play is supposed to be messy!), but to make cleanup intuitive and even enjoyable. Think of it as setting the stage for calm, focused play—where toys have a place, and children feel capable and in control.
Key Takeaways
- Low, open shelves promote independence: Children can see and reach toys easily, encouraging self-directed play.
- Rotate toys to reduce overwhelm: Limiting visible options helps kids focus and engage more deeply with each toy.
- Use natural, minimal materials: Wood, cotton, and wicker blend beautifully and support a calm aesthetic.
- Label with pictures for young learners: Visual cues help non-readers identify where items belong.
- Involve kids in cleanup: Make storage part of the routine so children learn responsibility and order.
- Keep it simple and functional: Avoid over-decorating; prioritize ease of use and accessibility.
- Create designated zones: Group similar toys together (e.g., art, blocks, books) for intuitive organization.
Quick Answers to Common Questions
What is the best height for Montessori toy shelves?
The best height is waist-level or lower for your child—typically 18 to 30 inches tall. This allows them to see and reach toys independently without climbing or asking for help.
How many toys should be out at once?
Limit visible toys to 5–10 at a time. This reduces overwhelm and helps children focus. Rotate the rest to keep play fresh and engaging.
Can I use plastic bins for Montessori storage?
It’s best to avoid plastic bins with lids. Open baskets or trays made from natural materials are preferred because they’re easier for children to access and promote independence.
How do I teach my toddler to clean up?
Start with simple, consistent routines. Use songs, timers, or games to make cleanup fun. Always model the behavior and praise effort, not just results.
Do I need a separate room for Montessori storage?
No. Montessori storage works in any space—bedrooms, living rooms, or playrooms. The key is creating defined zones and keeping materials accessible and organized.
📑 Table of Contents
- Why Montessori Toy Storage Matters
- Low, Open Shelves: The Foundation of Montessori Storage
- Rotating Toys to Reduce Clutter and Boost Engagement
- Using Baskets and Trays for Small Items
- Creating Zones for Different Types of Play
- Involving Kids in the Cleanup Process
- DIY and Budget-Friendly Storage Ideas
- Maintaining the System Over Time
- Conclusion
Why Montessori Toy Storage Matters
The way we store toys sends a message. Cluttered, overflowing bins tell kids, “This is chaos—don’t bother.” But low, open shelves with a few carefully chosen toys say, “This is your space. You can explore.” Montessori toy storage supports a child’s natural desire to learn and do things for themselves.
When toys are stored at a child’s eye level and within reach, they’re more likely to engage with them. This isn’t just convenient—it’s empowering. A toddler who can grab a book or a set of stacking rings without asking for help builds confidence and decision-making skills. Plus, when everything has a clear home, cleanup becomes part of the play process, not a dreaded chore.
Another key benefit? Reduced overwhelm. Too many toys at once can overstimulate young minds. By rotating toys and keeping only a few visible at a time, you help your child focus and dive deeper into play. This is especially helpful for kids who get distracted easily or struggle with transitions.
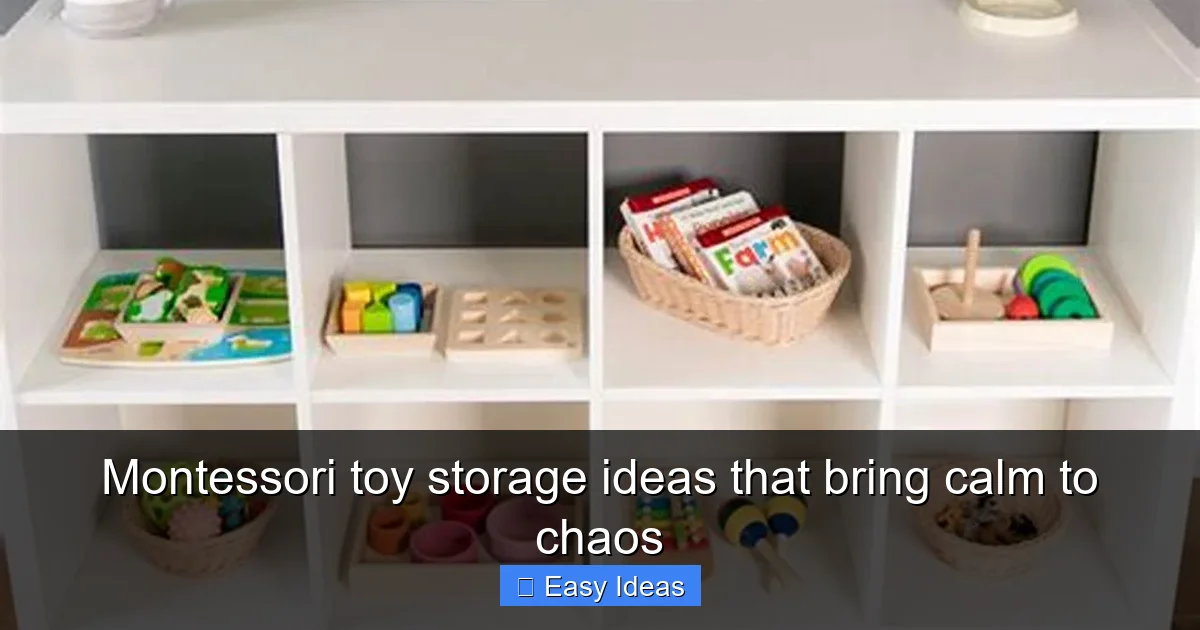
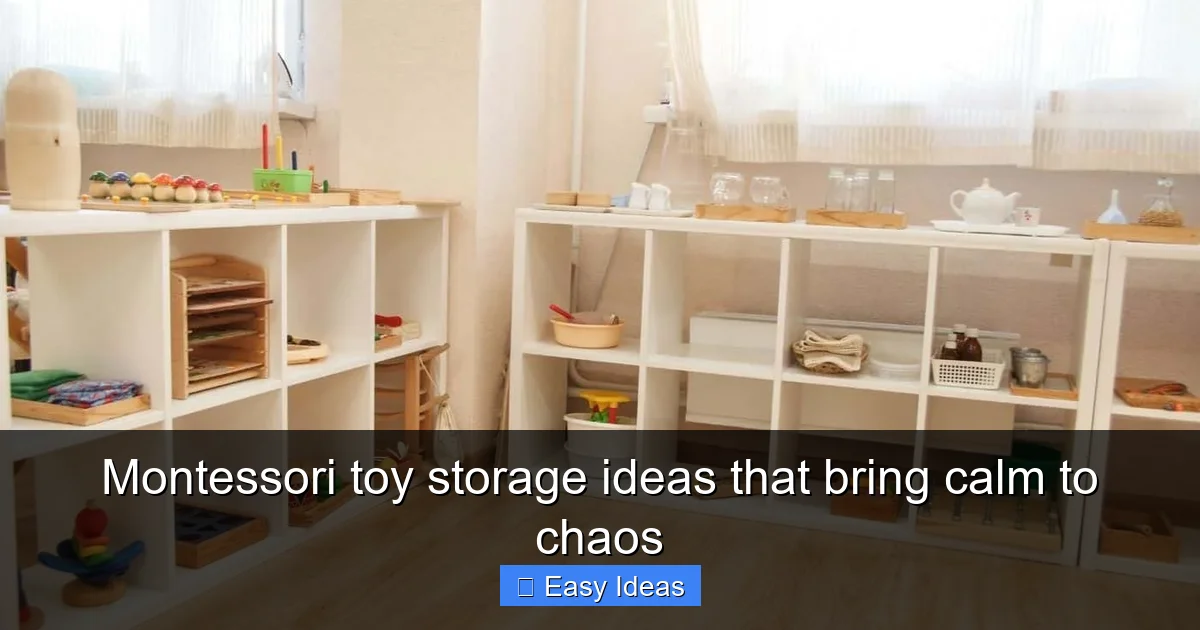
Low, Open Shelves: The Foundation of Montessori Storage
Visual guide about Montessori toy storage ideas that bring calm to chaos
Image source: simplelivingmommy.com
If there’s one staple in Montessori toy storage, it’s the low, open shelf. These aren’t your average bookcases. They’re typically waist-high or lower, with no doors or lids, and each shelf holds just a few toys or activities.
Why Open Shelves Work
Open shelves let kids see what’s available. There’s no guessing or digging through bins. A child can scan the shelf, choose what interests them, and return it when done. This visibility supports autonomy and reduces frustration.
Choosing the Right Shelf
Look for sturdy, child-sized units made from natural materials like solid wood or bamboo. Avoid plastic or flimsy designs. A simple IKEA Kallax or a handmade wooden shelf works perfectly. Paint or stain it in neutral tones—white, beige, or natural wood—to keep the focus on the toys, not the furniture.
How to Arrange Toys on Shelves
Place one toy or activity per shelf space. Use small baskets or trays to group related items, like crayons and paper or puzzle pieces. Rotate toys every week or two to keep things fresh. This prevents boredom and gives older toys new life when they reappear.
Rotating Toys to Reduce Clutter and Boost Engagement
Visual guide about Montessori toy storage ideas that bring calm to chaos
Image source: projectmontessori.com
One of the simplest Montessori toy storage ideas is rotating toys. Instead of displaying everything at once, keep half in storage and swap them out regularly.
How to Rotate Toys Effectively
Store unused toys in labeled bins in a closet or under the bed. Every week or two, switch out a few items. For example, swap building blocks for a sensory bin or replace dolls with a new puzzle. This keeps playtime exciting without adding more toys.
Benefits of Rotation
Rotating toys reduces visual clutter, helps kids appreciate what they have, and encourages deeper play. A child who sees the same toy every day might ignore it. But when it returns after a break, it feels new and exciting.
Tips for Success
– Use clear bins or baskets so you can see what’s inside.
– Label bins with pictures for non-readers.
– Involve your child in choosing which toys to rotate in.
– Keep a rotation schedule (e.g., every Monday) to stay consistent.
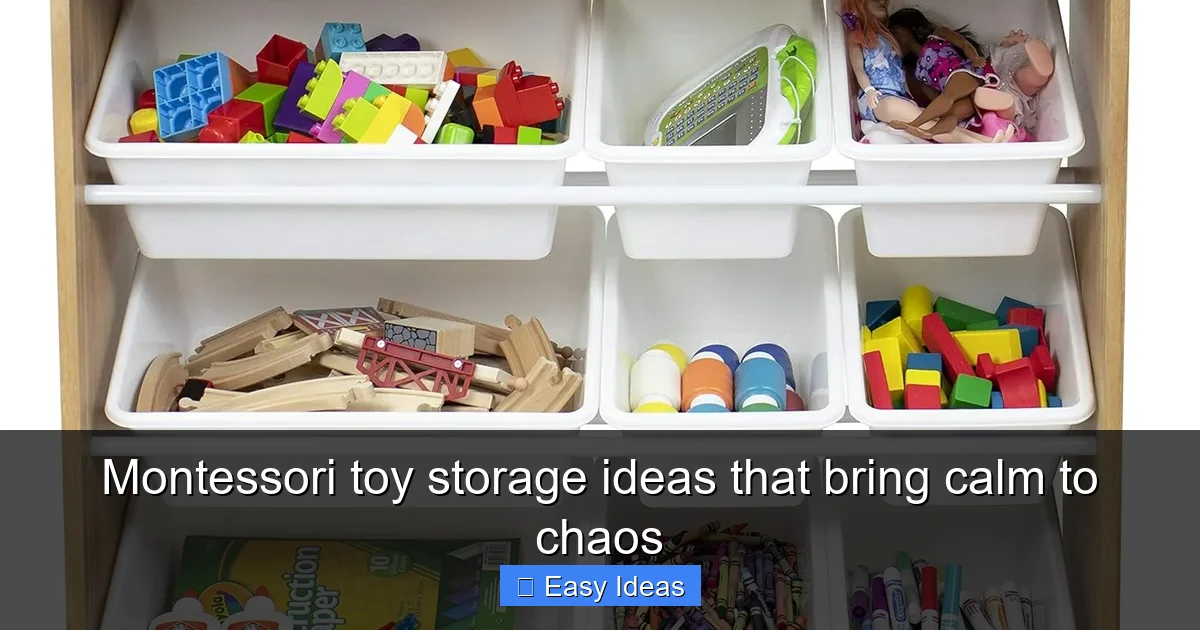
Using Baskets and Trays for Small Items
Visual guide about Montessori toy storage ideas that bring calm to chaos
Image source: mamasmusthaves.com
Small toys—like beads, figurines, or craft supplies—can easily get lost or scattered. That’s where baskets and trays come in. They’re perfect for containing tiny items while keeping them accessible.
Choosing the Right Containers
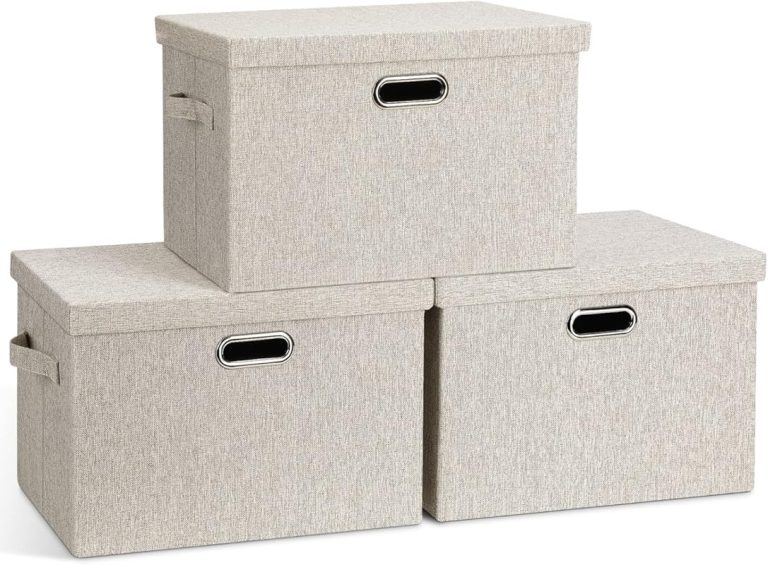
Opt for natural materials like wicker, seagrass, or cotton. These are durable, eco-friendly, and blend well with a Montessori aesthetic. Avoid plastic bins with lids—they’re hard for little hands to open and close.
Organizing by Category
Group similar items together. Use one basket for art supplies (crayons, scissors, glue), another for sensory toys (playdough, kinetic sand), and a third for small figurines. Place each basket on a low shelf or in a designated tray.
Labeling for Independence
Even if your child can’t read yet, they can learn to match pictures to objects. Print simple images of the contents and tape them to the front of each basket. Over time, your child will learn where everything goes—and take pride in putting things back.
Creating Zones for Different Types of Play
A well-organized play space has clear zones. This doesn’t mean separate rooms—just defined areas within one room. Think of it like a mini learning center at home.
Common Play Zones
– Reading Nook: A cozy corner with a small bookshelf, soft rug, and a few cushions. Store books on low shelves or in a rotating basket.
– Building Area: A shelf or tray for blocks, magnetic tiles, and construction sets. Keep them separate from small parts to avoid mixing.
– Art Station: A low table with baskets for paper, crayons, markers, and stickers. Use a tray to contain messes.
– Sensory Play: A bin or shelf for playdough, water beads, or rice bins. Store in sealed containers to prevent spills.
– Dramatic Play: A small wardrobe or shelf for dress-up clothes, dolls, and props.
Benefits of Zoning
Zones help kids focus. When everything has a place, they’re less likely to get distracted. It also makes cleanup easier—each zone has its own storage system.
Tips for Setting Up Zones
– Use rugs or floor mats to define spaces.
– Keep zones simple—don’t overcrowd with too many items.
– Rotate activities within zones to keep things fresh.
Involving Kids in the Cleanup Process
Montessori isn’t just about how you store toys—it’s about how kids interact with their environment. Teaching children to clean up is a vital part of the process.
Making Cleanup Fun
Turn cleanup into a game. Use a timer: “Let’s see how fast we can put all the blocks away!” Or sing a cleanup song. Make it a team effort—parents and kids clean together.
Teaching Responsibility
Even toddlers can help. Start with simple tasks: “Can you put the red blocks in the basket?” As they grow, give them more responsibility. A 4-year-old can sort toys by type or wipe down shelves.
Consistency Is Key
Make cleanup part of the daily routine. Do it after playtime, before meals, or at bedtime. The more consistent you are, the more natural it becomes for your child.
DIY and Budget-Friendly Storage Ideas
You don’t need to spend a fortune to create beautiful Montessori toy storage. Many solutions are simple, affordable, and even handmade.
Repurpose Household Items
Turn old shoeboxes into art supply bins. Use muffin tins for sorting small parts. Paint mason jars for crayon storage. These DIY options are eco-friendly and customizable.
Build Your Own Shelves
If you’re handy, build a low shelf using plywood and brackets. Sand it smooth and finish with non-toxic paint. It’s cheaper than buying new and fits your space perfectly.
Shop Secondhand
Check thrift stores, Facebook Marketplace, or garage sales for wooden shelves, baskets, and trays. A little sanding and paint can transform old furniture into Montessori-ready storage.
Use What You Have
Start with what’s already in your home. Rearrange existing furniture, use baskets you already own, and declutter first. Often, the best storage solution is simply using what you have more thoughtfully.
Maintaining the System Over Time
Once you’ve set up your Montessori toy storage, the work isn’t over. Maintenance is key to keeping the calm.
Regular Decluttering
Every few months, go through toys with your child. Ask, “Do you still play with this?” Donate or store items that are outgrown. This keeps the space manageable and teaches kids about letting go.
Adjust as They Grow
As your child develops new interests, update the storage. A toddler might need more sensory bins, while a preschooler might need space for art projects or science kits.
Stay Flexible
Montessori storage isn’t rigid. If a system isn’t working, change it. Maybe your child prefers bins over shelves, or they want more art supplies visible. Listen to their needs and adapt.
Conclusion
Montessori toy storage ideas aren’t about creating a perfect, magazine-ready room. They’re about building a space where children feel capable, calm, and curious. By using low shelves, rotating toys, and involving kids in cleanup, you create an environment that supports independence and joyful learning.
The beauty of these ideas is their simplicity. You don’t need expensive furniture or hours of setup. Start small—maybe just one shelf or one basket—and build from there. Over time, you’ll notice the difference: less chaos, more calm, and kids who love to play—and clean up—on their own.
Remember, the goal isn’t perfection. It’s progress. Every toy returned to its place is a small victory. Every time your child chooses a book over a screen, it’s a win. With thoughtful storage, you’re not just organizing toys—you’re nurturing confidence, focus, and a lifelong love of learning.
🎥 Related Video: MONTESSORI AT HOME: Montessori Toy Storage & Organization (+ Our WHOLE Collection!)
📺 Hapa Family
MONTESSORI AT HOME: MONTESSORI TOY STORAGE & ORGANIZATION (+ OUR WHOLE COLLECTION!) // Ashley shares her …
Frequently Asked Questions
What makes toy storage “Montessori”?
Montessori toy storage focuses on accessibility, simplicity, and child independence. It uses low, open shelves, natural materials, and limited toy rotation to support self-directed play and order.
How often should I rotate my child’s toys?
Rotate toys every 1–2 weeks. This keeps play exciting and prevents overstimulation. Watch your child’s interest levels to guide your timing.
Are Montessori shelves safe for toddlers?
Yes, when properly anchored to the wall. Use anti-tip straps to secure shelves, especially if they’re tall or hold heavy items. Always supervise young children during play.
Can Montessori storage work in small spaces?
Absolutely. Use vertical space with wall-mounted shelves, under-bed storage, or multi-functional furniture. Focus on quality over quantity to maximize limited room.
Should I label storage bins?
Yes, especially for young children. Use pictures or simple words to help them identify where items belong. This builds literacy skills and encourages independent cleanup.
What if my child doesn’t want to clean up?
Stay calm and consistent. Make cleanup part of the routine, use positive reinforcement, and involve your child in the process. Over time, it becomes a habit.