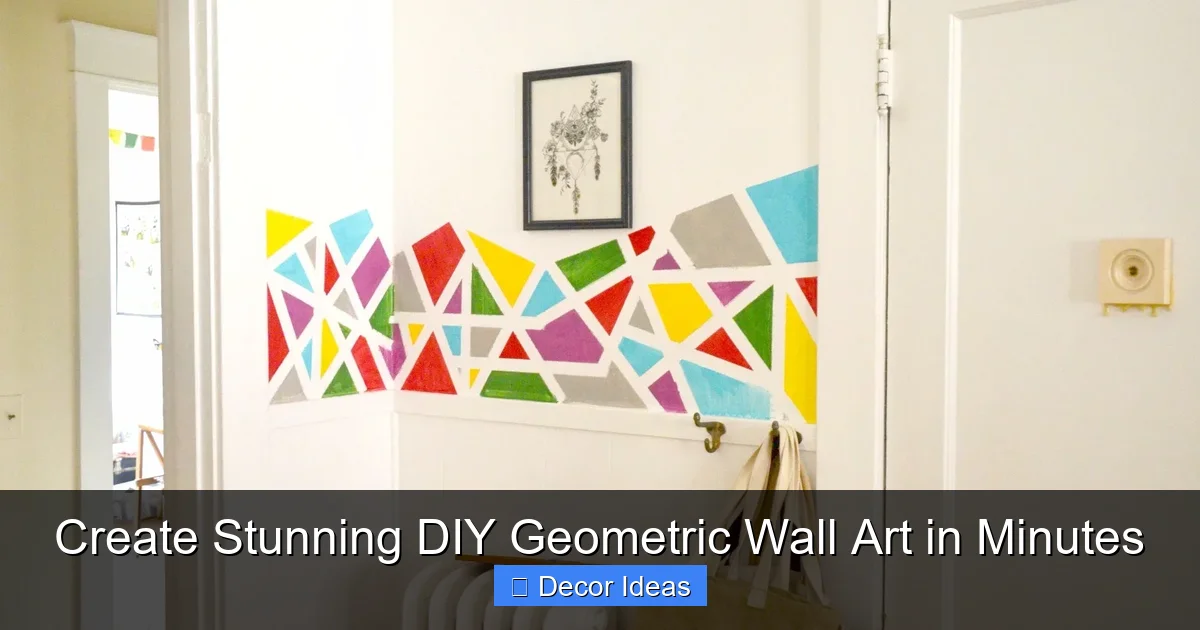
Create Stunning DIY Geometric Wall Art in Minutes
Create stunning DIY geometric wall art in minutes using basic supplies and simple techniques. Whether you’re a beginner or a seasoned crafter, this project adds modern flair to any room with minimal effort and maximum impact.
This is a comprehensive guide about diy geometric wall art.
Key Takeaways
- Easy and affordable: Most materials cost under $20 and can be found at craft stores or online.
- No advanced skills needed: Basic cutting, measuring, and taping are the only requirements.
- Customizable designs: Choose colors, shapes, and layouts that match your personal style and room decor.
- Quick to complete: Many projects take less than an hour from start to finish.
- Perfect for renters: Use removable adhesives to avoid damaging walls.
- Great for gifting: Handmade geometric art makes a thoughtful and unique present.
- Boosts room energy: Bold patterns and clean lines create a modern, calming atmosphere.
Why DIY Geometric Wall Art Is the Perfect Decor Upgrade
Looking to refresh your space without spending a fortune or hiring a designer? DIY geometric wall art is your answer. This trendy, modern decor style combines clean lines, bold shapes, and vibrant colors to create eye-catching focal points in any room. Whether you’re decorating a bedroom, living room, or home office, geometric patterns bring a sense of order and creativity that instantly elevates your interior.
The best part? You don’t need to be an artist or a DIY expert to pull it off. With just a few simple tools and a little creativity, you can transform a blank wall into a gallery-worthy masterpiece. From triangles and hexagons to abstract grids and overlapping shapes, the design possibilities are endless. Plus, making your own wall art means you get full control over the size, color scheme, and layout—ensuring it fits perfectly with your existing decor.
What You’ll Need to Get Started
Before diving into your project, it’s important to gather the right supplies. The good news is that most items are inexpensive and easy to find. Here’s a quick checklist to help you prepare:
Essential Tools and Materials
- Paint: Acrylic or wall paint in 2–4 complementary colors. Choose matte or satin finishes for a modern look.
- Painter’s tape: High-quality tape like FrogTape helps create crisp, clean lines.
- Measuring tape and ruler: For accurate spacing and alignment.
- Pencil and level: To mark guidelines and keep your design straight.
- Paintbrushes or rollers: Small brushes for detail work, rollers for larger areas.
- Drop cloth or old sheet: To protect your floors.
- Scissors or craft knife: For cutting tape or templates.
Optional Upgrades
- Stencils: Reusable plastic stencils make repeating patterns easier.
- Wasabi tape or washi tape: For temporary, colorful designs that won’t damage walls.
- Canvas or wood panels: If you prefer freestanding art over painted walls.
- Spray paint: Great for quick coverage on smaller projects.
Most of these items can be found at your local craft store, hardware store, or online. If you’re on a tight budget, check dollar stores or clearance sections for paint and tape. Remember, the key to great DIY geometric wall art is precision—so invest in good tape and take your time with measurements.
Step-by-Step Guide to Creating Your First Piece
Now that you’ve gathered your supplies, it’s time to create your first geometric wall art masterpiece. Follow these simple steps to ensure a professional-looking result every time.
Step 1: Choose Your Design
Start by deciding on a pattern. Popular options include:
- Triangles: Arrange equilateral or right triangles in a grid or scattered layout.
- Hexagons: Create a honeycomb effect with repeating hexagonal shapes.
- Overlapping circles: Use varying sizes for a dynamic, abstract look.
- Chevron or herringbone: Diagonal lines that add movement and energy.
- Geometric grids: Clean lines forming squares, rectangles, or diamonds.
Sketch your idea on paper first, or use free online tools like Canva or Adobe Express to visualize the layout. Keep it simple for your first project—complex designs can come later.
Step 2: Prep Your Wall
Clean the wall surface with a damp cloth to remove dust and grease. Let it dry completely. If you’re painting over a dark color, consider applying a base coat in a neutral tone (like white or light gray) to help your colors pop.
Step 3: Measure and Mark
Use a pencil and ruler to lightly mark where your shapes will go. For symmetry, find the center of the wall and work outward. Use a level to ensure lines are straight. For example, if you’re creating a triangle pattern, mark the base and apex points before connecting them with tape.
Step 4: Apply Painter’s Tape
This is where precision matters. Press the tape firmly along your pencil lines, making sure there are no gaps. Overlap tape ends neatly and avoid stretching the tape, which can cause uneven edges. For curved designs, use flexible tape or cut small slits to help it bend smoothly.
Step 5: Paint Your Design
Start with your base color if needed, then apply your accent colors. Use small brushes for tight corners and rollers for larger areas. Apply thin, even coats—two light coats are better than one heavy one. Let each coat dry completely before adding the next.
Step 6: Remove the Tape
Once the paint is dry to the touch (but not fully cured), slowly peel off the tape at a 45-degree angle. This helps prevent peeling or smudging. If you notice any imperfections, touch them up with a small brush.
Step 7: Admire Your Work
Step back and enjoy your new DIY geometric wall art! Add a few decorative items nearby—like a plant or a framed photo—to complete the look.
Creative Design Ideas to Inspire You
Once you’ve mastered the basics, the fun really begins. Here are some creative ways to take your geometric wall art to the next level.
Color Blocking with a Twist
Instead of traditional rectangles, try irregular color blocks with soft edges or overlapping layers. Use a sponge or dry brush technique to blend colors slightly for a more organic feel. This works especially well in bedrooms or nurseries.
3D Illusion Art
Create the illusion of depth by painting shapes that appear to pop off the wall. Use shading and contrasting colors to make cubes, pyramids, or diamonds look three-dimensional. This technique adds drama and sophistication to any space.
Mini Gallery Wall
Make several small geometric canvases in coordinating colors and hang them in a cluster. Mix shapes and sizes for a dynamic, gallery-style display. Use command strips for easy, damage-free hanging.
Accent Wall Focus
Turn an entire wall into a geometric masterpiece. A bold pattern behind a bed or sofa creates a stunning focal point. Choose a calming color palette for bedrooms or a vibrant one for living areas.
Seasonal Swaps
Change your wall art with the seasons. Use warm reds and oranges in fall, cool blues and silvers in winter, and bright pastels in spring. With removable tape and washable paint, switching designs is quick and easy.
Tips for Success and Common Mistakes to Avoid
Even the simplest DIY projects can go sideways if you’re not careful. Here are some pro tips to ensure your geometric wall art turns out flawless.
Use High-Quality Tape
Cheap tape can bleed paint or leave residue. Invest in painter’s tape designed for clean lines. Remove it while the paint is still slightly tacky—not fully dry—to avoid peeling.
Don’t Rush the Drying Process
Patience is key. Rushing to remove tape or add a second coat can ruin your hard work. Follow the paint manufacturer’s drying times, and avoid touching the surface until it’s completely dry.
Test Colors First
Paint a small sample on a spare board or inconspicuous area to see how the colors look in your room’s lighting. Natural light changes throughout the day, so check your sample in the morning, afternoon, and evening.
Keep It Balanced
Too many colors or shapes can overwhelm a space. Stick to a cohesive palette and limit your design to 3–4 main elements. Less is often more with geometric art.
Protect Your Floors
Even careful painters drip. Lay down a drop cloth or old sheet to catch paint splatters. It’s a small step that saves a lot of cleanup time.
How to Customize for Any Room
One of the best things about DIY geometric wall art is its versatility. With a few tweaks, you can adapt the same basic technique to suit any room in your home.
Living Room
Create a bold accent wall behind your sofa using large triangles or hexagons in rich jewel tones like emerald, sapphire, or deep plum. Add metallic accents with gold or copper paint for a luxurious touch.
Bedroom
Opt for calming shapes and soft colors. A repeating pattern of small circles in blush pink, lavender, or sage green promotes relaxation. Place the design above the headboard for a serene focal point.
Home Office
Boost focus and creativity with a clean grid pattern in black, white, and gray. Add a pop of color—like mustard yellow or teal—to stimulate energy and inspiration.
Kids’ Room
Let their imagination run wild with bright, playful shapes. Use washi tape to create temporary designs that can be changed as they grow. Animals made from geometric shapes (like a triangle fox or hexagon bee) are fun and educational.
Bathroom
Even small spaces benefit from geometric art. Paint a single wall with a subtle diamond pattern in soft blues or greens. Use waterproof paint to prevent moisture damage.
Conclusion: Transform Your Space with Confidence
DIY geometric wall art is more than just a decor trend—it’s a creative outlet that empowers you to personalize your home with style and ease. With minimal investment and a little time, you can create pieces that reflect your personality and enhance your living space. Whether you’re painting a single accent wall or crafting a gallery of mini masterpieces, the process is both fun and rewarding.
Remember, there’s no “perfect” way to do it. Experiment with colors, shapes, and layouts until you find what speaks to you. And don’t be afraid to make mistakes—they’re part of the learning process. With the tips and techniques in this guide, you’re well on your way to creating stunning DIY geometric wall art in minutes. So grab your tape, pick your palette, and start transforming your walls today.
Quick Answers to Common Questions
What’s the easiest geometric shape to start with?
Triangles are the easiest for beginners. They’re simple to measure and tape, and they create a bold, modern look with minimal effort.
Can I use regular tape instead of painter’s tape?
It’s not recommended. Regular tape can tear paint or leave sticky residue. Painter’s tape is designed to create clean lines and remove easily.
How do I fix paint bleeding under the tape?
Touch up the edges with a small brush and the wall’s base color. Let it dry, then apply a thin line of your accent color to cover the mistake.
Is DIY geometric wall art renter-friendly?
Yes! Use removable washi tape or paint on canvas panels instead of walls. Both options let you decorate without damaging property.
How long does it take for the paint to fully dry?
Most acrylic paints dry to the touch in 1–2 hours and cure fully in 24 hours. Wait at least 2 hours before removing tape.
🎥 Related Video: DIY Geometric Wall Art: How to Create a Modern Paint Design
📺 Fresh Coat Colors
In this video, we show you how to create a modern and bold geometric wall art using paint. This DIY project is perfect for anyone …
Frequently Asked Questions
What type of paint works best for geometric wall art?
Acrylic or wall paint in matte or satin finishes work best. They dry quickly, offer rich color, and are easy to clean up with water.
Can I create geometric art on textured walls?
It’s possible, but textured walls make clean lines harder to achieve. Consider using a canvas or wood panel instead for smoother results.
How do I keep my design symmetrical?
Use a measuring tape, pencil, and level to mark guidelines. Start from the center of the wall and work outward to maintain balance.
What if I don’t like the design after it’s done?
You can paint over it with a base color and start fresh. For temporary designs, use washi tape or removable decals.
Can kids help with this project?
Absolutely! Kids can help with taping, painting, and choosing colors. Just supervise closely and use washable supplies.
How do I hang geometric art made on canvas?
Use command strips, picture hangers, or adhesive hooks. For heavier pieces, use wall anchors and screws for secure mounting.