DIY Moss Wall Art Easy Steps for Stunning Home Decor
DIY moss wall art is a simple, eco-friendly way to bring lush greenery indoors without the hassle of maintenance. With just a few materials and some creativity, you can craft beautiful, textured wall pieces that elevate any room’s aesthetic.
Key Takeaways
- Eco-friendly decor: Moss wall art uses preserved or artificial moss, making it sustainable and long-lasting without harming the environment.
- Low maintenance: Unlike live plants, moss wall art doesn’t need watering, sunlight, or pruning—perfect for busy lifestyles.
- Customizable designs: You can shape, color, and arrange moss into endless patterns, from geometric shapes to abstract art.
- Improves air quality: Preserved moss can help absorb sound and improve indoor air by reducing dust and allergens.
- Affordable project: Most materials are budget-friendly and available at craft stores or online.
- Great for any room: Ideal for living rooms, bedrooms, offices, or even bathrooms with proper sealing.
- Quick to assemble: Most DIY moss wall art projects can be completed in under two hours.
Quick Answers to Common Questions
Can I use real moss from my yard?
It’s not recommended. Wild moss may contain pests, mold, or chemicals, and it will dry out and die indoors. Use preserved or artificial moss for best results.
Will moss wall art attract bugs?
Preserved and artificial moss are treated to resist pests. As long as your piece is clean and dry, bugs are unlikely to be attracted.
Can I hang moss wall art in a bathroom?
Yes, but only if the bathroom is well-ventilated. High humidity can damage preserved moss over time. Consider sealing it with a clear coat for protection.
How long does DIY moss wall art last?
With proper care, preserved moss can last 5–10 years. Artificial moss can last even longer with minimal fading.
Do I need special tools to make moss wall art?
No. A hot glue gun, scissors, and a frame are the main tools. Everything else is optional for customization.
📑 Table of Contents
- Why DIY Moss Wall Art Is the Perfect Home Decor Trend
- What Is Moss Wall Art?
- Materials You’ll Need for DIY Moss Wall Art
- Step-by-Step Guide to Creating Your Moss Wall Art
- Creative Design Ideas and Inspiration
- Tips for Maintaining Your Moss Wall Art
- Why DIY Beats Buying Pre-Made
- Final Thoughts: Bring Nature Indoors with DIY Moss Wall Art
Why DIY Moss Wall Art Is the Perfect Home Decor Trend
If you’ve ever walked into a modern home or boutique hotel and admired a lush, green wall that looks alive but requires no care, chances are you were looking at moss wall art. This trend has taken the interior design world by storm—and for good reason. It blends nature, art, and sustainability into one stunning visual statement.
Unlike traditional houseplants, moss wall art doesn’t need sunlight, soil, or regular watering. It’s perfect for people who love greenery but don’t have a green thumb—or the time to keep plants alive. Whether you’re renting and can’t install permanent features or just want a unique focal point, DIY moss wall art offers a flexible, stylish solution. Plus, it’s surprisingly easy to make yourself, even if you’re not a seasoned crafter.
What Is Moss Wall Art?
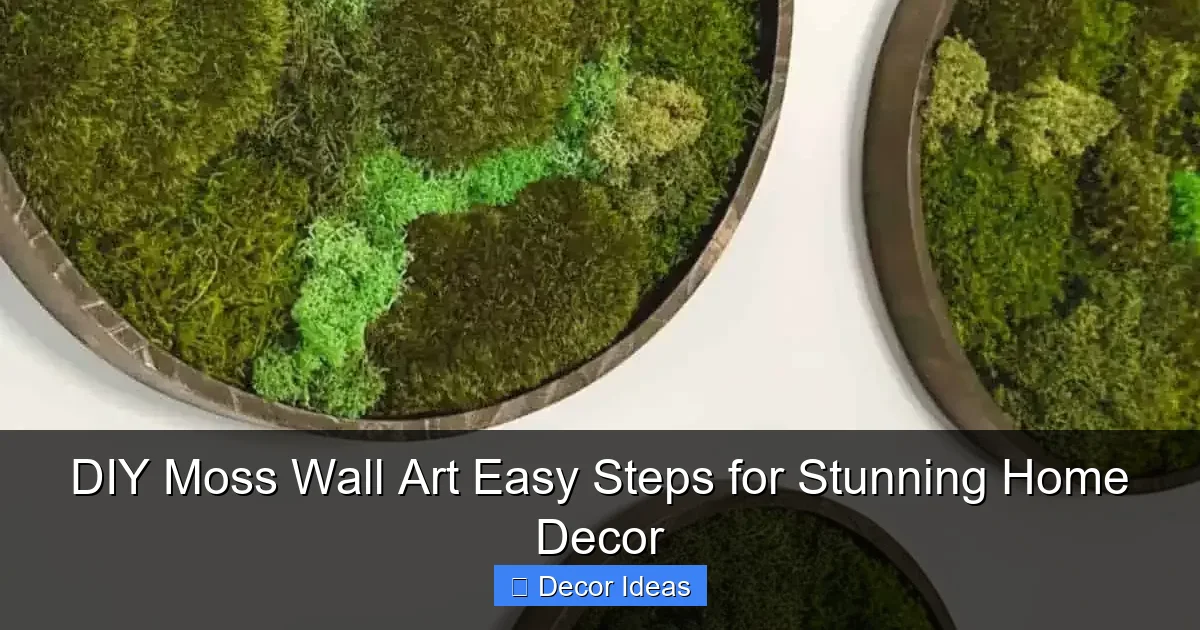
Moss wall art is a decorative panel or frame filled with preserved or artificial moss arranged in artistic patterns or shapes. It mimics the look of a living green wall but without the upkeep. The moss used is typically real moss that has been treated to retain its color and soft texture, or high-quality synthetic moss that looks incredibly realistic.
Visual guide about DIY Moss Wall Art Easy Steps for Stunning Home Decor
Image source: i.pinimg.com
Types of Moss Used
- Preserved moss: Real moss that’s been chemically treated to stop decay while keeping its natural look and feel. It’s eco-friendly and lasts for years.
- Artificial moss: Made from silk, foam, or plastic, this type is ideal if you want a completely maintenance-free option. Modern versions are hard to distinguish from the real thing.
- Sheet moss or reindeer moss: These are common varieties used in DIY projects due to their texture and ease of shaping.
Benefits of Moss Wall Art
Beyond aesthetics, moss wall art offers several practical benefits. It acts as a natural sound absorber, making it great for noisy spaces like home offices or open-plan living areas. It also helps regulate humidity and can reduce indoor pollutants. Plus, the calming green tones promote relaxation and mental well-being—perfect for bedrooms or meditation spaces.
Materials You’ll Need for DIY Moss Wall Art
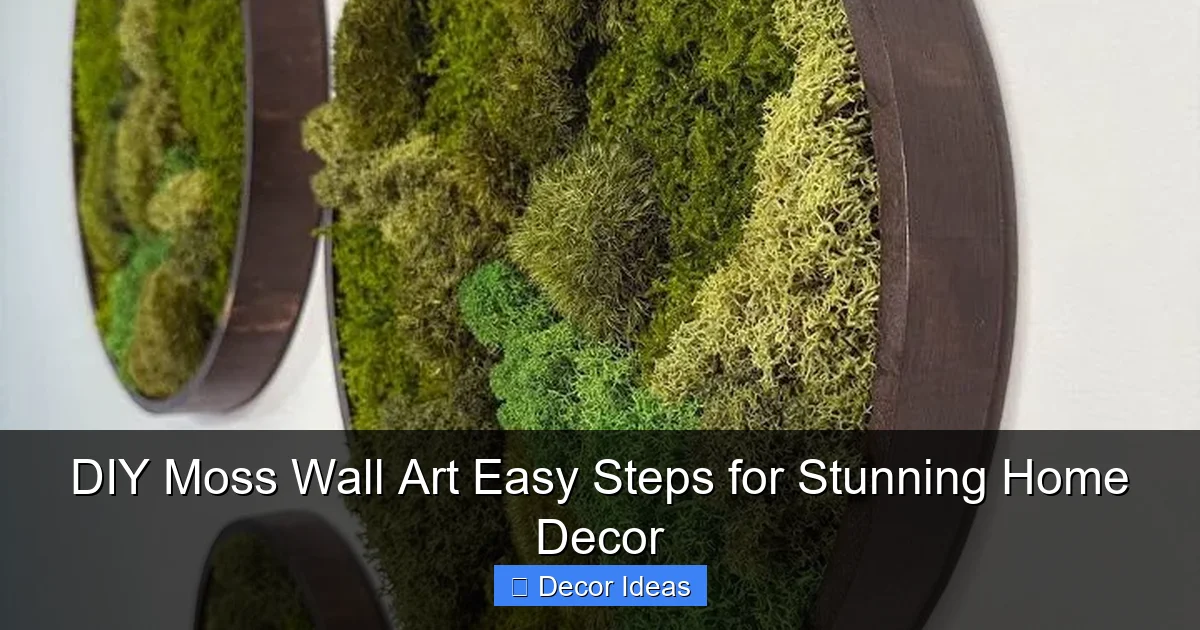
One of the best things about making your own moss wall art is how accessible the materials are. You don’t need fancy tools or a workshop—just a few key supplies you can pick up at a craft store or order online.
Visual guide about DIY Moss Wall Art Easy Steps for Stunning Home Decor
Image source: homebeautifully.com
Essential Supplies
- Wooden frame or backing board: A picture frame, shadow box, or piece of plywood works well. Choose a size that fits your wall space.
- Preserved or artificial moss: Available in sheets, clumps, or loose pieces. Buy extra to allow for trimming and shaping.
- Hot glue gun and glue sticks: Essential for securing moss to the backing. A low-temp gun is safer for delicate moss.
- Scissors or craft knife: For trimming moss to fit your design.
- Measuring tape and pencil: To mark your layout before gluing.
- Optional: spray adhesive, acrylic paint, or sealant: For added durability or color customization.
Where to Buy Materials
Check out craft stores like Michaels, Hobby Lobby, or Joann for frames and glue. For moss, online retailers like Amazon, Etsy, or specialty green wall suppliers offer a wide selection. Look for moss labeled “preserved” or “for decorative use” to ensure it’s safe for indoor projects.
Step-by-Step Guide to Creating Your Moss Wall Art
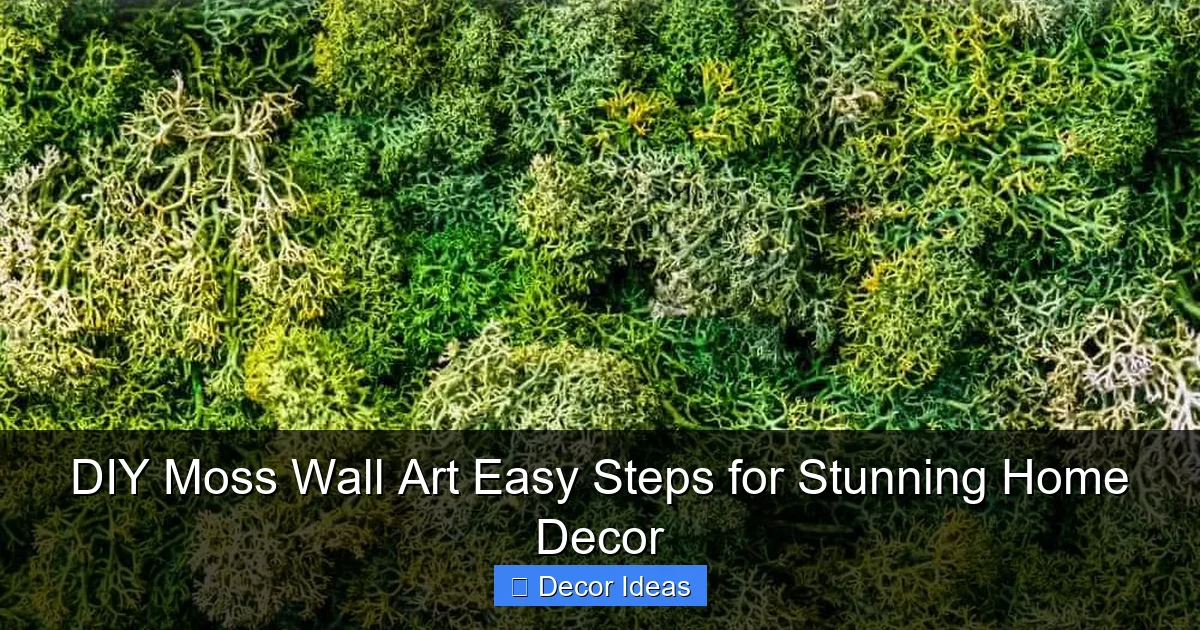
Ready to get started? Follow these simple steps to create your own stunning moss wall art. The whole process takes about 1–2 hours, depending on the size and complexity of your design.

Visual guide about DIY Moss Wall Art Easy Steps for Stunning Home Decor
Image source: diycrafts.life
Step 1: Choose Your Design
Before you begin, decide on the look you want. Do you prefer a geometric pattern, a heart shape, or a freeform organic layout? Sketch your idea on paper or use a digital tool to visualize it. Simple designs are great for beginners, while more complex patterns can be tackled once you’re comfortable with the process.
Step 2: Prepare the Backing
Clean your wooden frame or board to remove dust. If using a shadow box, make sure the interior is deep enough to hold the moss without bulging. You can paint the backing a neutral color (like white or gray) to make the green pop, or leave it natural for a rustic look.
Step 3: Cut and Arrange the Moss
Lay out your moss pieces on the backing to test the design. Trim larger pieces with scissors to fit curves or edges. Mix textures—combine fine sheet moss with chunkier reindeer moss for visual interest. Don’t glue anything yet—just play with the layout until you’re happy.
Step 4: Glue the Moss in Place
Once your design is set, start gluing. Use a hot glue gun to attach small sections at a time. Apply glue to the back of the moss, not the board, to avoid visible residue. Press firmly for 10–15 seconds to ensure a strong bond. Work from the center outward to prevent shifting.
Step 5: Fill Gaps and Add Details
After the main pieces are secured, fill in any gaps with smaller moss bits. You can also add decorative elements like dried flowers, twigs, or small stones for extra texture. If desired, lightly spray the finished piece with a clear sealant to protect it from dust and humidity.
Step 6: Hang and Enjoy
Let the glue dry completely (about 30 minutes). Then, attach picture hooks or adhesive strips to the back and hang your artwork. Place it in a spot where it can be admired—above a sofa, beside a mirror, or in an entryway.
Creative Design Ideas and Inspiration
The beauty of DIY moss wall art is its versatility. You can match it to any interior style—from minimalist modern to boho chic. Here are some creative ideas to spark your imagination.
Geometric Patterns
Create clean lines and shapes using contrasting moss types. Try a hexagon grid, a chevron design, or a circular mandala. Use a ruler and pencil to mark guidelines before gluing for precision.
Nature-Inspired Shapes
Cut moss into leaf shapes, tree silhouettes, or mountain ranges. These organic forms bring a sense of calm and connection to nature. You can even layer different shades of green for depth.
Monogram or Word Art
Spell out a name, initials, or a meaningful word like “breathe” or “home.” Use stencils to trace letters onto the backing, then fill them in with moss. This makes a thoughtful personalized gift.
Mixed Media Combinations
Combine moss with other natural elements like driftwood, pressed flowers, or sea glass. This adds dimension and tells a story. Just make sure all materials are securely attached and won’t shed over time.
Colorful Accents
While green is classic, don’t be afraid to experiment. Use fabric dye or spray paint to tint moss in soft pastels or bold hues. Pink, blue, or gold moss can create a whimsical or modern twist.
Tips for Maintaining Your Moss Wall Art
One of the biggest perks of moss wall art is how little care it needs. But a little attention goes a long way in keeping it looking fresh.
Cleaning and Dusting
Use a soft brush or a can of compressed air to gently remove dust every few months. Avoid water or cleaning sprays, as moisture can damage preserved moss.
Placement Matters
While moss wall art is low maintenance, it’s best kept away from direct sunlight, high heat, or excessive humidity (like steamy bathrooms without ventilation). These conditions can cause fading or mold.
Refreshing Over Time
If your moss starts to look dull after a few years, you can lightly mist it with a water and glycerin solution (1:1 ratio) to restore softness. For artificial moss, a fabric refresher spray works well.
Repairing Damage
If a piece comes loose, simply re-glue it with a fresh dot of hot glue. Keep extra moss on hand for touch-ups.
Why DIY Beats Buying Pre-Made
You might be tempted to buy a ready-made moss wall panel—and those can be beautiful. But making your own offers unique advantages.
Cost-Effective
Pre-made moss art can cost $100 or more, depending on size. DIY versions often cost under $50, especially if you reuse materials.
Personalized Touch
When you make it yourself, you control the size, shape, color, and style. It becomes a true reflection of your taste and space.
Therapeutic and Fun
The process of creating art is calming and rewarding. It’s a great weekend project to do solo or with family and friends.
Sustainable Choice
By choosing preserved moss and reusable frames, you’re reducing waste and supporting eco-conscious decor.
Final Thoughts: Bring Nature Indoors with DIY Moss Wall Art
DIY moss wall art is more than just a decor trend—it’s a creative, sustainable, and accessible way to transform your space. Whether you’re looking to add a touch of greenery to a blank wall or create a bold statement piece, this project delivers beauty without the burden of upkeep.
With just a few simple materials and a little imagination, you can craft something truly unique. It’s perfect for renters, plant lovers, and anyone who appreciates the calming presence of nature indoors. So gather your supplies, pick a design, and start creating. Your walls—and your well-being—will thank you.
🎥 Related Video: How to Make Moss Wall Art With Hilton Carter | DIY Moss Wall Art
📺 HGTV Home
Hilton Carter, plant stylist, artist and author of Wild Creations, is here to teach us how to incorporate greenery into our decor.
Frequently Asked Questions
What’s the difference between preserved and artificial moss?
Preserved moss is real moss treated to maintain its look and texture without growing. Artificial moss is synthetic but designed to mimic the real thing. Both are low-maintenance and safe for indoor use.
Can I paint moss for my wall art?
Yes, but use fabric dye or spray paint lightly. Heavy paint can clog the texture and make it look unnatural. Test on a small piece first.
Is moss wall art safe for pets?
Preserved moss is generally non-toxic, but it’s best to keep it out of reach of curious pets who might chew on it. Artificial moss is safer if ingested in small amounts.
Can I make a large moss wall panel?
Absolutely. Use a large wooden board or multiple frames connected together. Just ensure the backing is sturdy enough to support the weight.
Do I need to water moss wall art?
No. Preserved and artificial moss do not require water. In fact, moisture can damage them over time.
Where is the best place to hang moss wall art?
Living rooms, bedrooms, home offices, and entryways are ideal. Avoid direct sunlight and high-moisture areas like unventilated bathrooms.


