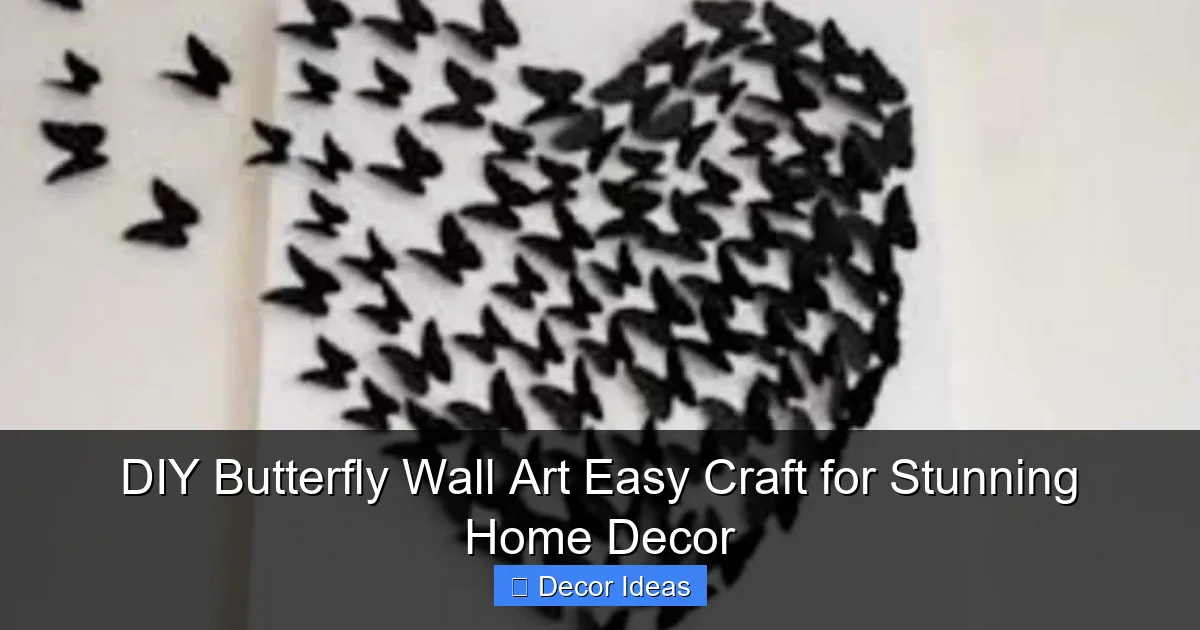
DIY Butterfly Wall Art Easy Craft for Stunning Home Decor
DIY butterfly wall art is a fun, budget-friendly craft that adds color and charm to any room. With just a few supplies and simple techniques, you can create beautiful, personalized decor in under an hour.
Looking to refresh your space without spending a fortune? DIY butterfly wall art is one of the easiest and most rewarding crafts you can try. Whether you’re decorating a nursery, sprucing up your living room, or adding a pop of color to a dull hallway, handmade butterfly decor brings life, movement, and a touch of nature indoors. The best part? You don’t need to be an artist or a seasoned crafter to pull it off.
Butterflies symbolize transformation, beauty, and freedom—making them a meaningful addition to any home. And when you create them yourself, each piece carries a little extra love and personality. From paper cutouts to fabric silhouettes, there’s a butterfly design for every skill level and style preference. Plus, this project is incredibly versatile: you can go minimalist with monochrome wings or go bold with rainbow hues and glitter accents.
In this guide, we’ll walk you through everything you need to know to create your own stunning DIY butterfly wall art. We’ll cover materials, step-by-step instructions, styling tips, and creative variations so you can make something truly unique. Whether you’re crafting solo or making it a family activity, this project is sure to spark joy—and maybe even inspire a whole gallery wall!
Key Takeaways
- Easy & Affordable: Most materials cost under $20 and can be found at craft stores or repurposed from household items.
- Customizable Designs: Choose colors, sizes, and arrangements to match your room’s style—boho, modern, or whimsical.
- Perfect for Beginners: No advanced skills needed; great for kids, teens, and adults alike.
- Instant Room Upgrade: A cluster of handmade butterflies can transform a blank wall into a focal point.
- Great for Gifts: Personalized butterfly art makes a heartfelt present for birthdays, baby showers, or housewarmings.
- Eco-Friendly Option: Use recycled paper, old magazines, or fabric scraps to reduce waste while crafting.
- Quick Project: Most designs take 30–60 minutes from start to finish.
Quick Answers to Common Questions
What’s the best material for DIY butterfly wall art?
Cardstock or scrapbook paper works best because it’s sturdy and holds its shape. For a softer look, try fabric or watercolor paper.
Can I make butterfly wall art without damaging my walls?
Yes! Use removable adhesive dots, painter’s tape, or washi tape to hang your butterflies safely—ideal for renters.
How many butterflies should I make for a wall display?
It depends on the wall size, but 5–15 butterflies in varying sizes usually create a balanced, eye-catching arrangement.
Is this craft safe for kids to do?
Absolutely! Just supervise younger children when using scissors. Older kids can handle the entire project independently.
Can I use recycled materials for butterfly art?
Yes! Old magazines, gift wrap, and cardboard boxes are perfect for eco-friendly butterfly creations.
📑 Table of Contents
Why Butterfly Wall Art Works So Well in Home Decor
Butterflies aren’t just pretty—they’re powerful design elements. Their symmetrical shapes and vibrant colors naturally draw the eye, making them ideal for creating visual interest on otherwise plain walls. When grouped together, butterflies can form a dynamic composition that feels both playful and harmonious.
One reason DIY butterfly wall art is so popular is its adaptability. You can scale the size to fit any space—tiny butterflies for a cozy corner or oversized ones as a statement piece. They also blend seamlessly with various decor styles. For example, metallic butterflies add glam to a modern bedroom, while watercolor-style paper butterflies bring a soft, artistic touch to a child’s room.
Another benefit? Butterflies create a sense of movement. Even though they’re stationary on the wall, their wing shapes and placement suggest flight, giving your space a light, airy feel. This makes them especially effective in small rooms where you want to avoid heavy or cluttered visuals.
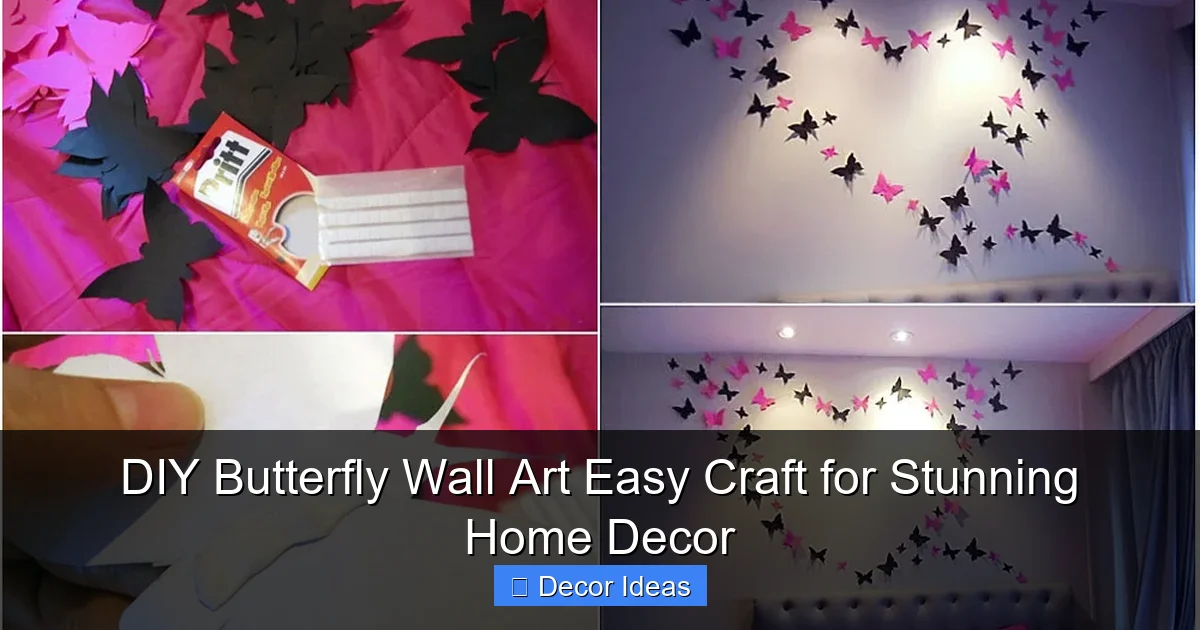
Materials You’ll Need for DIY Butterfly Wall Art
Visual guide about DIY Butterfly Wall Art Easy Craft for Stunning Home Decor
Image source: cdn.wonderfuldiy.com
The beauty of this craft is that you probably already have many of the supplies at home. But if not, most items are inexpensive and easy to find at craft stores, dollar shops, or online.
Basic Supplies
- Paper: Cardstock, scrapbook paper, old book pages, or even magazine cutouts work great. Choose colors and patterns that match your room.
- Scissors: A good pair of sharp scissors is essential for clean cuts, especially for detailed wing shapes.
- Pencil and Ruler: For drawing and measuring butterfly templates.
- Glue or Double-Sided Tape: To attach butterflies to the wall or backing board.
- Painter’s Tape or Removable Adhesive Dots: For hanging without damaging walls—perfect for renters.
Optional Upgrades
- Glitter or Metallic Paint: Adds sparkle and dimension.
- Washi Tape: Use to create wing patterns or as a hanging method.
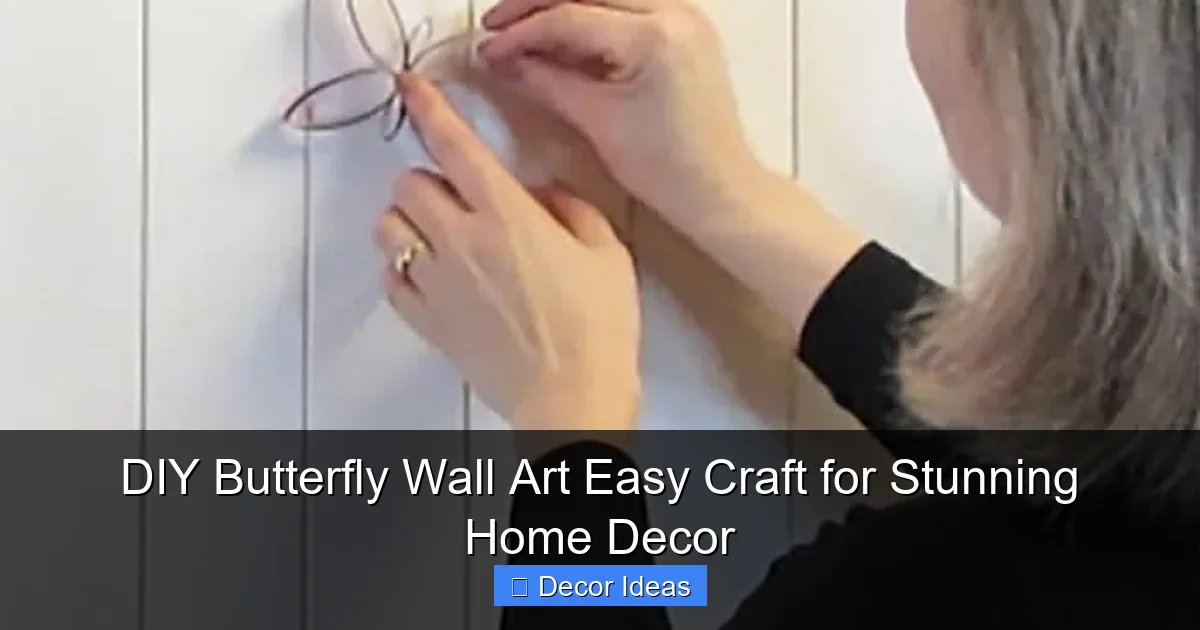
- Wire or Floral Stems: For 3D butterflies that appear to be flying off the wall.
- Foam Boards or Canvas: Mount your butterflies on a backdrop for a polished look.
- Stickers or Rhinestones: For extra embellishment.
Pro tip: Raid your recycling bin! Old greeting cards, gift wrap, and even cereal boxes can be transformed into beautiful butterfly wings with a little creativity.
Step-by-Step Guide to Making Paper Butterfly Wall Art
Visual guide about DIY Butterfly Wall Art Easy Craft for Stunning Home Decor
Image source: ohohdeco.com
Ready to get crafting? Follow these simple steps to create your own paper butterfly wall art. This method uses basic folding and cutting techniques—no glue gun or special tools required.
Step 1: Create a Butterfly Template
Start by drawing a butterfly shape on a piece of cardboard or thick paper. Make it symmetrical, with two upper wings and two lower wings. You can make it as simple or detailed as you like. Once you’re happy with the design, cut it out—this will be your template.
Step 2: Trace and Cut Your Wings
Place the template on your chosen paper and trace around it. Flip the template over to mirror the shape for the opposite side. Cut out pairs of wings. For variety, make different sizes—small, medium, and large butterflies look great together.
Step 3: Add Details (Optional)
Use markers, paint, or stickers to add patterns to the wings. Try polka dots, stripes, or floral designs. You can also layer different colored papers for a stained-glass effect.
Step 4: Fold for Dimension
Gently fold each wing pair down the center (like a book) to create a 3D effect. This gives your butterflies a more lifelike appearance and helps them stand out from the wall.
Step 5: Arrange and Hang
Lay your butterflies on the floor or table to plan your layout. Try a cascading cluster, a symmetrical grid, or a random scatter. Once you’re happy, use removable adhesive dots or painter’s tape to attach them to the wall. For a floating effect, leave a small gap between the butterfly and the wall.
Creative Variations to Try
Visual guide about DIY Butterfly Wall Art Easy Craft for Stunning Home Decor
Image source: irp-cdn.multiscreensite.com
Once you’ve mastered the basics, it’s time to get creative! Here are some fun twists on the classic paper butterfly design.
Fabric Butterfly Wall Art
Use scraps of cotton, felt, or lace to make soft, textured butterflies. Cut the fabric using your paper template, then glue or sew the layers together. Add a wire body for a more realistic look. These work beautifully in boho or rustic-themed rooms.
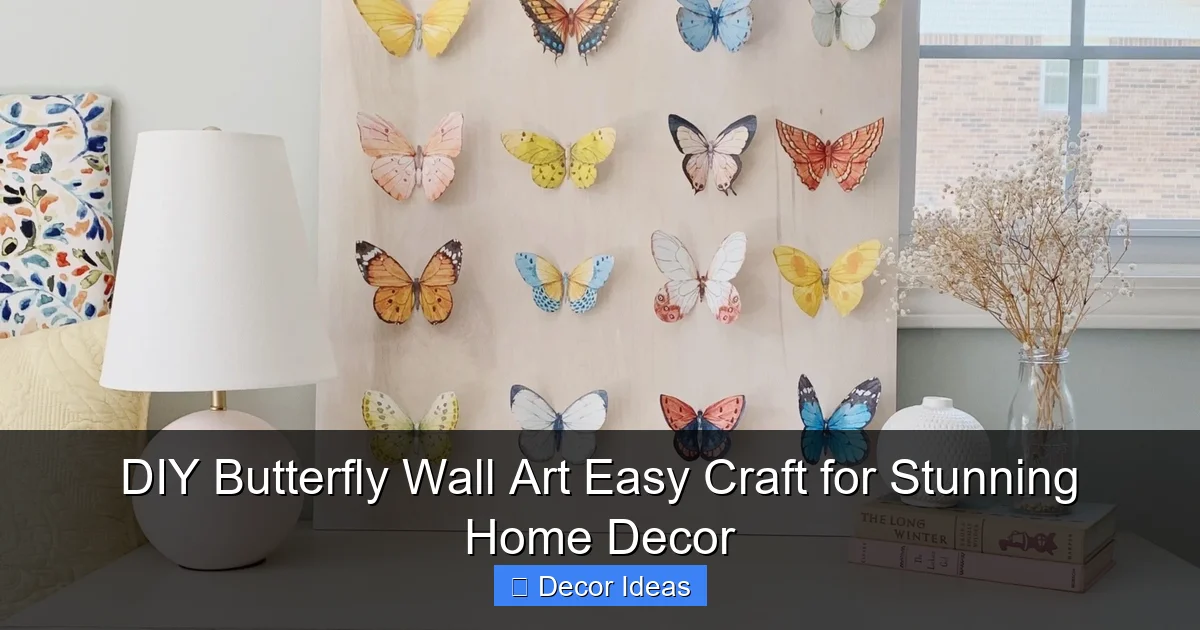
Watercolor Butterfly Art
Paint your butterfly shapes with watercolors on watercolor paper. Let them dry, then cut them out. The soft, blended colors create a dreamy, artistic vibe—perfect for nurseries or meditation spaces.
3D Hanging Butterflies
Attach your butterflies to thin floral wire or string and hang them from the ceiling or a wall-mounted branch. This creates a magical, floating effect, especially when lit by natural light.
Monochrome Minimalist Style
Stick to one color—like black, white, or gold—for a sleek, modern look. Use metallic paper or spray paint for a luxe finish. Arrange them in a clean grid for a gallery-style display.
Seasonal Themes
Customize your butterflies for holidays or seasons. Use red and green for Christmas, pastels for spring, or orange and black for Halloween. Add tiny holiday-themed details like tiny Santa hats or snowflakes.
Tips for Styling Your Butterfly Wall Art
Placement and arrangement can make or break your display. Here’s how to style your DIY butterfly wall art like a pro.
Choose the Right Wall
Pick a wall that needs a focal point—above a bed, sofa, or console table. Avoid high-traffic areas where butterflies might get bumped.
Play with Scale and Spacing
Mix large and small butterflies for visual interest. Space them about 2–4 inches apart. If you’re going for a dense look, overlap them slightly.
Use a Backing Board
For a cleaner look, mount your butterflies on a foam board, canvas, or painted wood panel. This also makes it easier to move or gift your artwork.
Lighting Matters
Natural light enhances the colors and textures of your butterflies. If placing near a window, consider how the light changes throughout the day. For evening viewing, add a small spotlight or LED strip.
Pair with Other Decor
Combine your butterfly art with plants, mirrors, or framed photos. Just make sure the butterflies remain the star of the show.
Why This Craft Is Perfect for Everyone
You don’t need to be a craft expert to enjoy making DIY butterfly wall art. It’s a relaxing, meditative activity that boosts creativity and reduces stress. Plus, it’s a great way to involve kids—they’ll love cutting, coloring, and arranging the butterflies.
This project also teaches valuable skills like following instructions, using tools safely, and planning a design. And because it’s so customizable, no two pieces are alike. Your wall art will be a true reflection of your personality and style.
Whether you’re decorating your first apartment, refreshing a child’s room, or looking for a meaningful gift, butterfly wall art is a simple yet impactful choice. It’s affordable, eco-friendly, and endlessly creative.
So grab your scissors, pick your favorite colors, and let your imagination take flight. With just a little time and effort, you can transform any wall into a vibrant, inspiring masterpiece.
🎥 Related Video: 6 UNIQUE DIY Butterfly Wall Hanging Craft ideas | Easy & Budget-Friendly Home Decor 2025 🦋
📺 Kalyani’s corner
6 UNIQUE DIY Butterfly Wall Hanging craft ideas | Easy & Budget-Friendly Home Decor 2025 Transform ur walls with these …
Frequently Asked Questions
How long does it take to make DIY butterfly wall art?
Most projects take between 30 and 60 minutes, depending on the number of butterflies and level of detail. It’s a quick craft with big impact.
What’s the easiest butterfly design for beginners?
The folded paper butterfly is the simplest. Just cut, fold, and hang—no glue or complex steps required.
Can I hang butterfly art in a bathroom or kitchen?
Yes, but avoid high-moisture areas. Use sealed paper or laminate the butterflies to protect them from humidity.
Do I need special tools to make 3D butterflies?
Not necessarily. You can create dimension with folding or by attaching wings to a wire frame using glue or tape.
How do I keep my butterfly art from falling off the wall?
Use strong adhesive dots or small nails for heavier pieces. For lightweight paper, painter’s tape works perfectly.
Can I sell my handmade butterfly wall art?
Yes! Many crafters sell their creations on platforms like Etsy. Just ensure your designs are original and high quality.