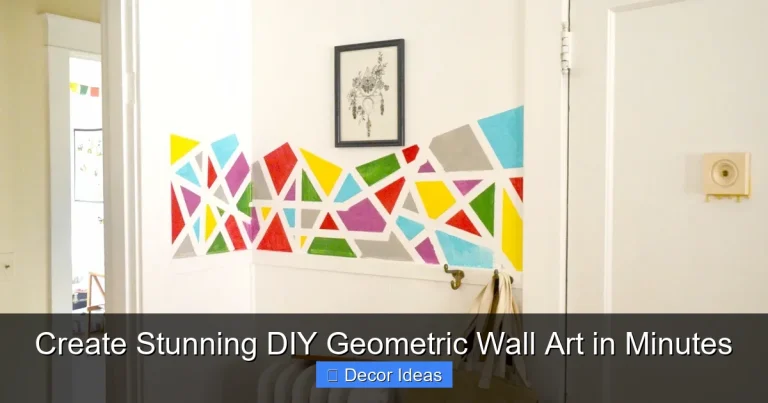
DIY Family Tree Wall Art for a Personal Touch
DIY family tree wall art is a meaningful way to celebrate your heritage and add a personal touch to your home decor. With just a few supplies and some creativity, you can craft a beautiful, custom piece that tells your family’s unique story and becomes a cherished conversation starter.
Key Takeaways
- Personalized Home Decor: DIY family tree wall art transforms blank walls into emotional focal points that reflect your family’s history and values.
- Affordable and Accessible: Most materials—like canvas, paint, photos, and twine—are inexpensive and easy to find at craft stores or online.
- Customizable Designs: From minimalist line drawings to colorful painted trees with photo leaves, you can tailor the style to match your home’s aesthetic.
- Engages All Ages: This project is family-friendly, making it a fun activity for kids, parents, and grandparents to work on together.
- Meaningful Gift Idea: Handmade family tree art makes a heartfelt gift for weddings, anniversaries, or new homes.
- Preserves Memories: Incorporating photos and names helps preserve family stories and keeps loved ones—even those no longer with us—close at heart.
- Easy to Update: As your family grows, you can easily add new names, photos, or branches to keep the artwork current.
Quick Answers to Common Questions
What materials do I need for DIY family tree wall art?
You’ll need a canvas or board, acrylic paints, brushes, photos, glue, scissors, and optional items like twine or markers. Most supplies are affordable and available at craft stores.
Can kids help make family tree wall art?
Absolutely! Kids can paint leaves, glue photos, or write names. It’s a fun, educational activity that teaches them about family history.
How do I include photos in my family tree?
Print small photos, cut them into leaf shapes, and glue them onto the branches. Alternatively, hang them with twine and mini clothespins for a 3D effect.
What if I’m not good at drawing?
No problem! Use a printed tree outline to trace, or sketch lightly with a pencil first. You can also use stencils or freehand a simple design.
Can I update my family tree over time?
Yes! Use removable adhesives or magnets for photos and names so you can easily add new family members as your tree grows.
📑 Table of Contents
Why DIY Family Tree Wall Art Belongs in Your Home
There’s something deeply comforting about walking into a room and seeing your family’s story displayed proudly on the wall. DIY family tree wall art does more than just fill empty space—it creates a sense of belonging, continuity, and love. In a world where homes often feel more like showrooms than sanctuaries, this handmade piece brings warmth and authenticity.
Unlike mass-produced decor, a DIY family tree is one-of-a-kind. It’s not just about aesthetics; it’s about identity. Whether you’re honoring ancestors, celebrating current family members, or welcoming new additions, this project turns memories into art. Plus, it’s a wonderful way to spark conversations with guests, especially children who are curious about where they come from.
Getting Started: Materials and Planning
Before you dive in, take a moment to plan your design and gather your supplies. The beauty of DIY family tree wall art is that it doesn’t require professional skills or expensive tools. With a little creativity and the right materials, anyone can create something beautiful.
Essential Supplies
Here’s a basic list of what you’ll need:

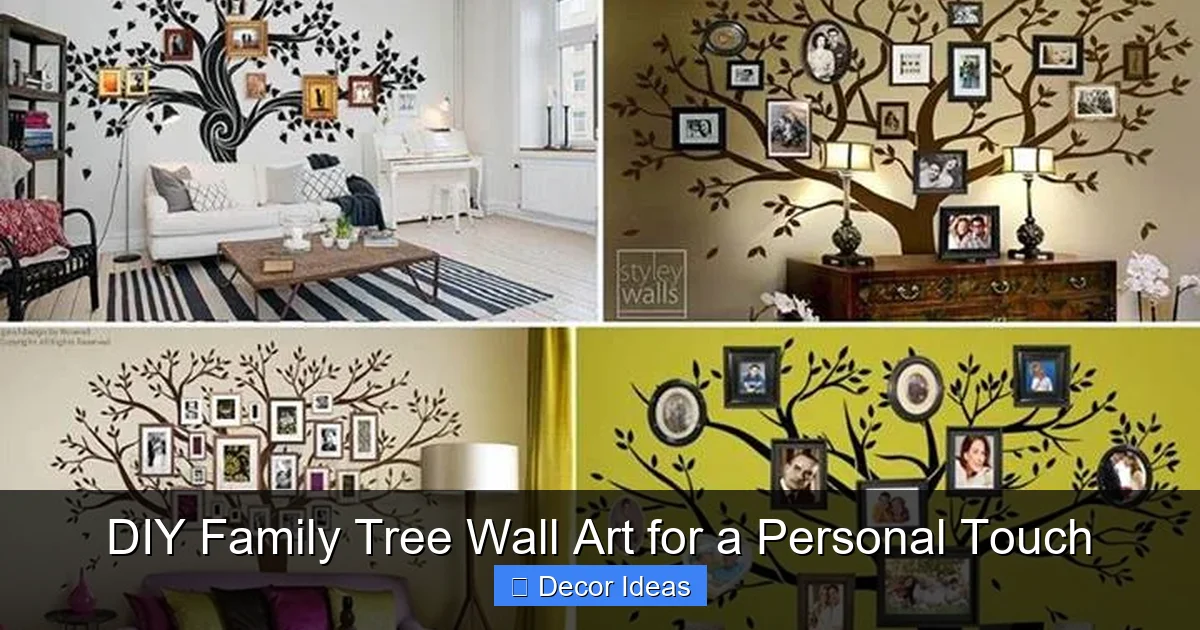
Visual guide about DIY Family Tree Wall Art for a Personal Touch
Image source: cdn.wonderfuldiy.com
- A canvas, wooden board, or large piece of cardboard (16”x20” or larger works well)
- Acrylic paints (brown for the trunk, green for leaves, and accent colors if desired)
- Paintbrushes (various sizes for details and broad strokes)
- Pencil and eraser for sketching
- Photos of family members (printed or digital prints)
- Scissors and glue or double-sided tape
- Twine, string, or thin wire (optional, for hanging photos)
- Markers or fine-tip pens for writing names
- Protective sealant (optional, to preserve the artwork)
Choosing Your Style
There are many ways to design your family tree. Consider these popular styles:
- Classic Painted Tree: A hand-painted tree with names or photos as leaves. Ideal for a rustic or traditional look.
- Photo Collage Tree: Use printed photos as leaves, attached with glue or string. Great for visual impact.
- Minimalist Line Art: A simple black or white outline of a tree with names written in elegant script. Perfect for modern homes.
- 3D Hanging Tree: Attach small photo frames or ornaments to a painted tree using twine. Adds depth and texture.
Gathering Family Information
Take time to collect names, birthdates, and photos. Reach out to relatives for input—this can be a bonding experience. Create a simple family tree chart on paper first to organize branches and generations. Include pets if you’d like! The more personal, the better.
Step-by-Step Guide to Creating Your Family Tree
Now that you’re prepared, let’s walk through the process of making your DIY family tree wall art. Follow these steps for a smooth and enjoyable experience.
Step 1: Sketch the Tree
Lightly draw the tree trunk and branches on your canvas with a pencil. Keep it simple—start with a thick trunk that splits into two main branches, then add smaller ones. Don’t worry about perfection; organic, uneven lines look more natural. If you’re not confident in your drawing skills, print a tree outline and trace it onto the canvas.
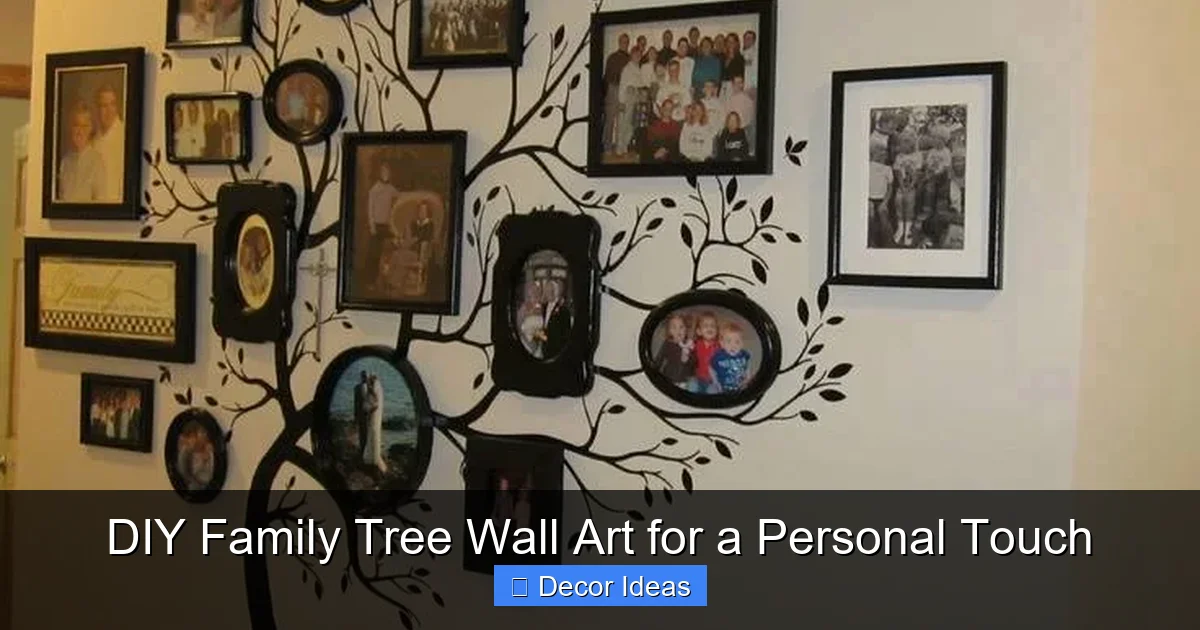
Visual guide about DIY Family Tree Wall Art for a Personal Touch
Image source: cdn.wonderfuldiy.com
Step 2: Paint the Tree
Use brown acrylic paint to fill in the trunk and branches. Let it dry completely. For a more artistic touch, add subtle shading with a darker brown or even a hint of gray. Once dry, you can outline the tree with a fine brush and black or dark brown paint to make it pop.
Step 3: Add Leaves and Names
This is where your family comes to life. You have several options:
- Painted Leaves: Use green paint to dot leaves along the branches. While painting, write each family member’s name inside or near the leaf.
- Photo Leaves: Print small photos (1”x1” or 2”x2”), cut them into leaf shapes, and glue them onto the branches. Write names on the back or beside each photo.
- Hanging Photos: Attach mini clothespins to twine and hang photos from the branches like ornaments. This 3D effect is especially charming in nurseries or living rooms.
Step 4: Personalize with Details
Add meaningful touches to make your tree unique. Include birthdates, anniversaries, or short quotes. Use different colored pens or paints to distinguish generations—blue for grandparents, pink for parents, yellow for children, for example. You can also add small symbols like hearts, stars, or tiny flowers to represent personalities or milestones.
Step 5: Seal and Display
Once everything is dry, consider applying a clear acrylic sealant to protect your artwork from dust and fading. Then, hang it in a prominent spot—above a sofa, in a hallway, or in a child’s room. Use sturdy hooks or picture hangers, especially if your piece includes hanging elements.
Creative Variations and Themes
One of the best things about DIY family tree wall art is its versatility. You can adapt it to suit any season, holiday, or home style. Here are some fun ideas to inspire your creativity.
Seasonal Family Trees
Change your tree with the seasons! In fall, use warm reds, oranges, and yellows for leaves. In winter, paint snow on the branches and add tiny snowflakes. For spring, go bright with pastel greens and flowers. This keeps your decor fresh and engaging year-round.
Visual guide about DIY Family Tree Wall Art for a Personal Touch
Image source: cdn.wonderfuldiy.com
Cultural and Heritage Themes
Honor your family’s roots by incorporating cultural symbols. For example, use Celtic knots in the branches for Irish heritage, or include traditional patterns from your ancestors’ homeland in the background. You can also write names in multiple languages to celebrate bilingual families.
Pet-Inclusive Trees
Pets are family too! Add a small paw print or a photo of your dog or cat on a lower branch. Some families even create a “paw branch” dedicated to furry members. It’s a sweet way to include everyone who shares your home.
Interactive Family Trees
Make your tree a living project. Use removable stickers or magnets for names and photos so you can update it as your family grows. This is especially great for families with young children who love to help add new siblings or cousins.
Tips for Success and Common Mistakes to Avoid
Even simple projects can go off track if you’re not careful. Here are some practical tips to ensure your DIY family tree wall art turns out beautifully—and lasts for years.
Start Small and Simple
If you’re new to crafting, begin with a basic design. A single tree with painted leaves and names is easier to manage than a complex 3D piece. You can always expand later.
Use High-Quality Photos
Blurry or low-resolution photos will look pixelated when printed small. Use clear, well-lit images. If scanning old photos, clean them gently and scan at 300 DPI for best results.
Let Layers Dry Completely
Rushing the drying process can smudge paint or warp paper. Be patient—especially between painting and gluing photos. Use a hairdryer on low heat if you’re in a hurry, but avoid overheating.
Avoid Overcrowding
It’s tempting to include every relative, but too many names or photos can make the tree look cluttered. Focus on immediate family and key ancestors. You can always create a second tree for extended family.
Test Colors First
Paint a small sample on scrap paper to see how colors look together. What looks good on the palette might not work on the canvas. Test skin tones for photo backgrounds too.
Involve the Family
Make it a group activity! Kids can paint leaves, grandparents can share stories, and teens can help with design. It’s not just about the final product—it’s about the time spent together.
Meaningful Gifts and Family Traditions
DIY family tree wall art isn’t just for your own home—it makes a deeply personal gift. Imagine giving a newlywed couple a tree with both families’ names, or presenting a new parent with a tree that includes their child’s name and birthdate. These pieces become treasured heirlooms.
You can also turn it into a family tradition. Create a new tree every five years to reflect growth and change. Host a “Family Tree Night” where everyone contributes ideas and helps assemble the artwork. Over time, you’ll have a collection that tells the evolving story of your family.
Conclusion: A Legacy on the Wall
DIY family tree wall art is more than a craft project—it’s a celebration of who you are and where you come from. It turns ordinary walls into galleries of love, memory, and connection. Whether you choose a painted masterpiece, a photo-filled collage, or a minimalist design, the result is a unique piece that no store-bought item can replicate.
The process itself is rewarding. It encourages storytelling, strengthens family bonds, and creates something tangible from intangible memories. And as your family grows, so can your tree. Add new branches, new names, new photos—your artwork evolves just like your family does.
So gather your supplies, call up your relatives, and start creating. Your DIY family tree wall art will not only beautify your home but also serve as a daily reminder of the people who matter most. It’s decor with heart, and that’s something worth hanging on to.
🎥 Related Video: Big Wooden Family Tree with Frames, Large Family Tree Wall Art, Wood Family Tree with Birds Photo
📺 The Crafty Ideas
Frequently Asked Questions
How long does it take to make DIY family tree wall art?
Depending on the design, it can take anywhere from 2 to 6 hours. Simple painted trees take less time, while photo-heavy or 3D versions may require more drying and assembly time.
What size should my canvas be?
A 16”x20” or 18”x24” canvas works well for most homes. Larger sizes make a bold statement, while smaller ones are great for nurseries or apartments.
Can I make a digital family tree instead?
Yes! Use design software like Canva or Adobe Spark to create a digital version. Print it on high-quality paper or canvas for a modern twist.
How do I preserve my family tree artwork?
Apply a clear acrylic sealant to protect against dust and fading. Avoid hanging it in direct sunlight to prevent colors from bleaching over time.
What if I don’t have photos of older relatives?
Use written names, birthdates, or symbolic representations like flowers or stars. You can also include short quotes or stories to honor their memory.
Is DIY family tree wall art suitable for renters?
Yes! Use removable adhesive hooks or command strips to hang it without damaging walls. You can also mount it on a freestanding board for easy relocation.