How to Organize a Craft Closet: Simple Steps for Ultimate Order
Is your craft closet a messy jumble of supplies that makes it hard to find what you need? You’re not alone.
When your creative space is cluttered, it can drain your inspiration and slow down your projects. But imagine opening your closet and instantly spotting every tool, ribbon, and paper you want—neatly arranged and easy to reach. In this post, you’ll discover simple, practical steps to transform your craft closet into an organized haven.
By the end, you’ll feel excited to create, knowing your supplies are perfectly in place. Ready to take control of your craft space? Let’s get started!
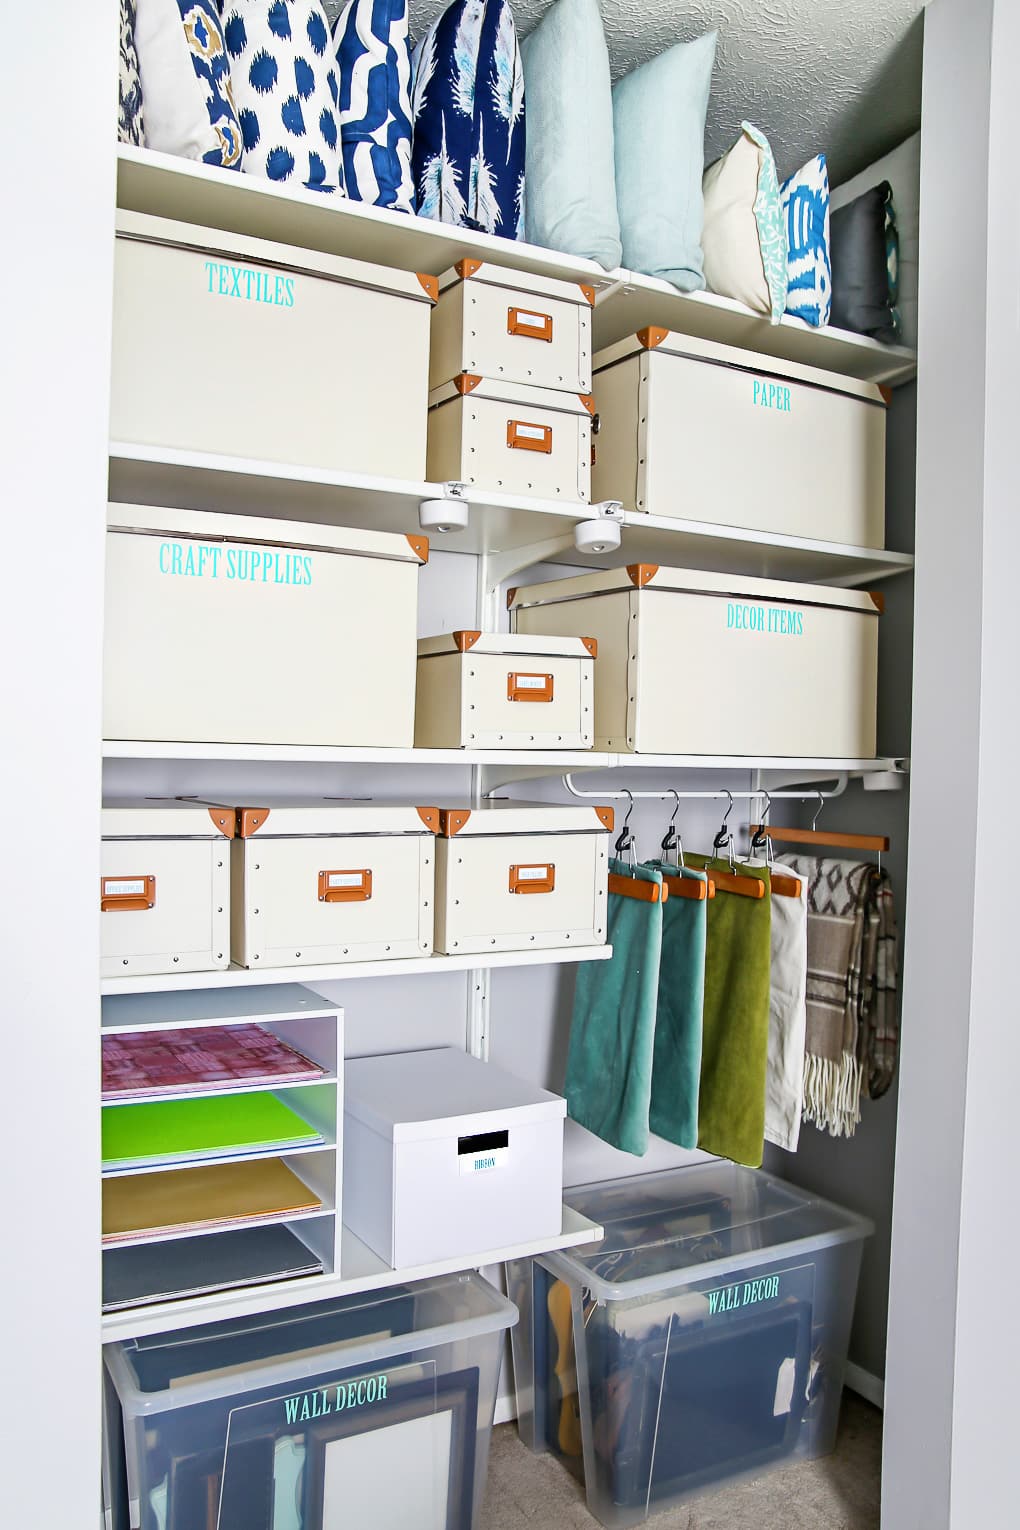
Credit: justagirlandherblog.com
Assess Your Space
Assessing your craft closet space is the first step to better organization. It helps you understand what you have and what you need. This step saves time and reduces clutter. Start by examining the entire area carefully. Knowing your space makes sorting and storing easier.
Measure Dimensions
Take a tape measure and note the height, width, and depth of your closet. Write down these numbers. These measurements help you buy the right storage containers. You avoid buying items that do not fit. Measuring also reveals unused corners or shelves.
Identify Storage Needs
Think about the types of craft supplies you own. Some items need drawers, others need shelves or bins. Decide if you need hanging space or small compartments. Choose storage that matches your craft habits. Proper storage keeps supplies easy to find and use.
Sort Craft Supplies
Empty your closet and group similar items together. Put all paints in one pile, papers in another, and tools in a separate spot. Toss broken or dried-out items. Sorting reduces clutter and shows what you really have. It also helps decide how much storage you need.
Credit: www.thecountrychiccottage.net
Choose Storage Solutions
Choosing the right storage solutions is key to organizing a craft closet. Good storage keeps supplies neat and easy to find. It also saves space and reduces clutter. Pick options that fit your craft items and the space available. Think about how often you use each item and choose storage that suits your needs.
Shelves And Bins
Shelves create open space for large and small items. Use sturdy shelves to hold boxes, fabric, and paper. Bins fit well on shelves and keep things tidy. Clear bins help you see what is inside without opening them. Stack bins to use vertical space efficiently. Choose bins with lids to protect supplies from dust.
Drawer Organizers
Drawers are great for small tools and materials. Use drawer organizers to separate items like scissors, glue, and pens. Organizers keep things from mixing and make it easier to find what you need. You can buy adjustable dividers or small containers to fit inside drawers. This method keeps your workspace clean and items ready to use.
Labeling Systems
Labels help you quickly find your supplies. Use simple labels with clear words or pictures. Label bins, shelves, and drawers to avoid confusion. You can use paper labels, stickers, or a label maker. Consistent labeling makes cleaning up faster. It also helps others find things if you share your space.
Maximize Vertical Space
Maximizing vertical space in a craft closet saves room and keeps supplies easy to find. Using walls and tall spaces helps store many items without clutter. Vertical storage lets you see everything at a glance. This makes crafting faster and more fun.
Wall-mounted Racks
Wall-mounted racks hold tools, yarn, and other supplies neatly. They keep items off the floor and counters. Install racks at different heights to fit various items. Use small shelves for jars of beads or buttons. Larger racks can hold rolls of fabric or paper. This method uses empty wall space well.
Pegboards And Hooks
Pegboards offer flexible storage with hooks and shelves. Hang scissors, ribbons, and brushes on hooks for quick access. Move hooks around to fit new tools easily. Pegboards keep your workspace clear and organized. They also show your supplies clearly, so you know what you have. This system grows with your craft needs.
Create Zones For Projects
Creating zones for projects helps keep your craft closet neat and easy to use. Each zone holds materials and tools for specific tasks. This setup saves time and reduces mess.
Separate By Craft Type
Divide your closet into sections based on craft types. Keep knitting supplies in one area. Store painting items in another. This separation helps find items quickly. It also stops materials from mixing and getting lost.
Designate Work Areas
Set up small workspaces inside your closet. Use a table or shelf for each craft zone. Keep tools and materials close to the work area. This makes crafting faster and more fun. Clean up is easier too.
Maintain Your Craft Closet
Keeping your craft closet neat takes more than just one big clean-up. Regular care helps your space stay useful and inviting. A well-maintained craft closet saves time and reduces stress during projects. It also protects your supplies from damage and loss.
Regular Decluttering
Set a schedule for clearing out unused items. Remove old glue, dried paint, or broken tools. Toss or donate supplies you no longer need. This keeps your closet from becoming crowded and hard to use. Regular decluttering makes room for new materials and ideas.
Reassess Storage Needs
Your craft needs change over time. Check if your current storage fits new supplies or tools. Swap out small containers for bigger ones if needed. Add shelves or bins to hold growing collections. Adjusting your storage keeps everything organized and easy to find.
Keep Supplies Accessible
Arrange your most-used items within easy reach. Store less-used materials on higher shelves or back corners. Label bins and drawers clearly for quick access. Use clear containers to spot supplies fast. An accessible craft closet makes projects start faster and flow better.

Credit: www.iheartorganizing.com
Frequently Asked Questions
What Are The Best Ways To Start Organizing A Craft Closet?
Begin by sorting all items into categories. Remove unused supplies. Use clear containers for visibility. Label everything for easy access. Prioritize frequently used items at eye level to save time and keep the space tidy.
How Can I Maximize Space In A Small Craft Closet?
Use vertical storage like wall-mounted shelves and pegboards. Opt for stackable bins and drawer organizers. Utilize door space with hanging racks. Keep only essential items to avoid clutter and make the most of limited space.
What Storage Solutions Work Best For Craft Supplies?
Clear plastic bins, drawer dividers, and stackable containers work well. Use small jars for beads or buttons. Pegboards are great for tools. Label each container to quickly find what you need and maintain organization.
How Often Should I Declutter My Craft Closet?
Declutter every 3 to 6 months. Regularly remove expired or unused materials. This keeps the space functional and prevents buildup. A quick review helps maintain order and inspires creativity.
Conclusion
Organizing a craft closet saves time and reduces stress. Clear bins and labels help find supplies quickly. Keeping similar items together makes crafting easier. Regularly sorting and tidying keeps the space neat. A well-organized closet sparks creativity and joy. Start small and build your system step by step.
Enjoy your crafts with less mess and more fun.