DIY Wood Mountain Wall Art for a Rustic Home Touch
DIY wood mountain wall art is an easy, affordable way to bring natural beauty and rustic charm into your home. With basic tools and reclaimed wood, you can craft a one-of-a-kind piece that reflects your style and adds warmth to any room.
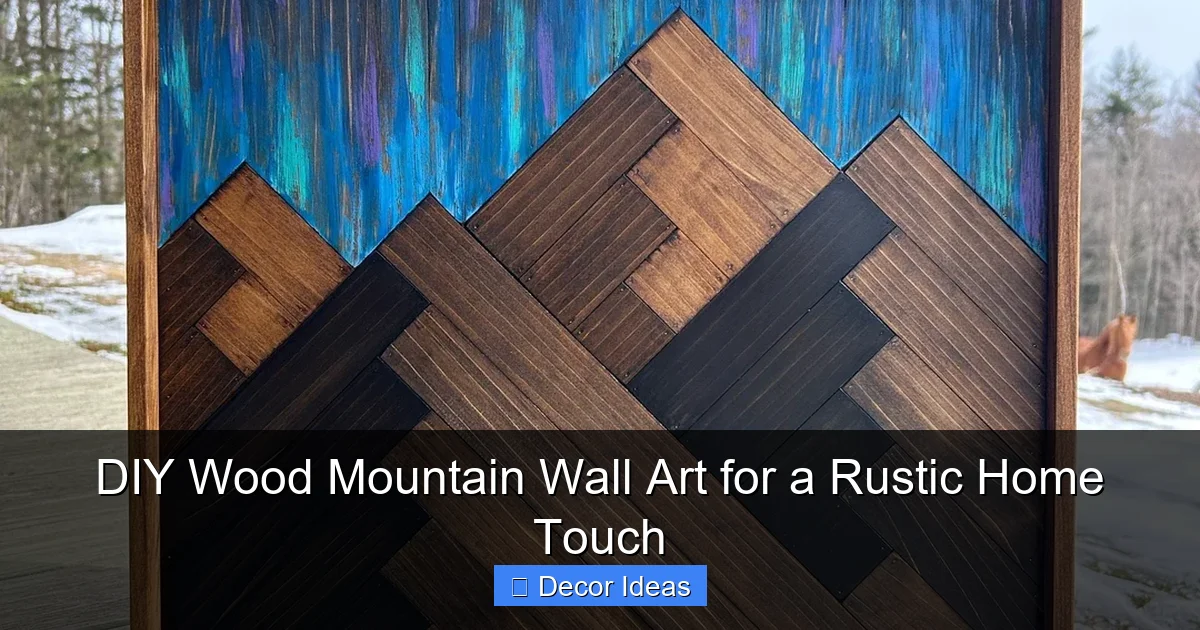
Looking to add a touch of nature-inspired charm to your living room, bedroom, or cabin? DIY wood mountain wall art is the perfect project for anyone who loves handmade decor with a rustic flair. Whether you’re a seasoned crafter or a total beginner, this project is simple, satisfying, and surprisingly affordable. With just a few pieces of wood, some basic tools, and a little creativity, you can transform a blank wall into a stunning focal point.
What makes wood mountain art so special? It’s the blend of natural materials and organic shapes that echo the beauty of real landscapes. Unlike printed canvas or mass-produced decor, each piece is unique—shaped by the grain of the wood, the way it’s cut, and how the layers come together. Plus, because you’re building it yourself, you can tailor the size, color, and style to perfectly fit your space. From minimalist single-peak designs to dramatic multi-layered mountain ranges, the possibilities are endless.
Key Takeaways
- Eco-friendly and budget-conscious: Use reclaimed or scrap wood to reduce waste and save money while creating beautiful art.
- Customizable designs: Choose mountain silhouettes, layering styles, and wood tones to match your home’s aesthetic.
- Beginner-friendly project: No advanced woodworking skills needed—just a saw, sandpaper, and a few basic tools.
- Adds texture and depth: Layered wood pieces create a 3D effect that enhances visual interest on blank walls.
- Perfect for rustic, modern, or cabin decor: This versatile piece complements a wide range of interior styles.
- Personalized finishing touches: Stain, paint, or leave natural to reflect your unique taste and home vibe.
- Great for gifting: Handmade wood mountain art makes a thoughtful, handmade gift for housewarmings or holidays.
Quick Answers to Common Questions
What type of wood is best for mountain wall art?
Pine, plywood, or reclaimed wood like pallet wood work great. They’re affordable, easy to cut, and take stain or paint well.
Can I make this without power tools?
Yes! A coping saw or hand saw can cut the shapes if you don’t have a jigsaw. It just takes a bit more time and patience.
How do I hang a heavy wood mountain piece?
Use D-ring hangers or keyhole brackets screwed into the back, and hang it on wall anchors or studs for support.
Can I paint the mountains different colors?
Absolutely! Use acrylic or chalk paint to create gradients, sunsets, or contrasting layers for a unique look.
Is this project safe for kids to help with?
With supervision, yes! Kids can help with sanding, painting, and arranging layers—just keep cutting and drilling tasks for adults.
📑 Table of Contents
Why Choose DIY Wood Mountain Wall Art?
There’s something deeply grounding about bringing elements of the outdoors inside. Wood mountain wall art captures the quiet majesty of nature and turns it into a piece of functional art. But beyond its aesthetic appeal, this project offers practical benefits too.
First, it’s incredibly budget-friendly. You don’t need expensive materials—scrap wood from old pallets, flooring, or furniture can work beautifully. Many home improvement stores even sell inexpensive pine boards perfect for crafting. Second, it’s eco-conscious. Reusing wood reduces waste and gives new life to materials that might otherwise end up in a landfill. And third, it’s a rewarding creative outlet. There’s a special kind of joy in making something with your own hands, especially when it transforms your living space.
Aesthetic Versatility
One of the biggest advantages of DIY wood mountain wall art is how well it fits into different decor styles. In a rustic cabin, it feels right at home beside a stone fireplace or leather sofa. In a modern living room, a sleek, stained version can add warmth and contrast to clean lines and neutral tones. Even in a cozy nursery, a soft-painted mountain scene can create a calming, nature-inspired backdrop.
Personalization and Uniqueness
No two pieces of wood are exactly alike, which means your mountain art will be one-of-a-kind. The natural grain, knots, and color variations add character and depth. You can also personalize the design—include your favorite mountain range, add a tiny cabin or tree silhouette, or even paint a sunrise behind the peaks. This level of customization is hard to find in store-bought decor.
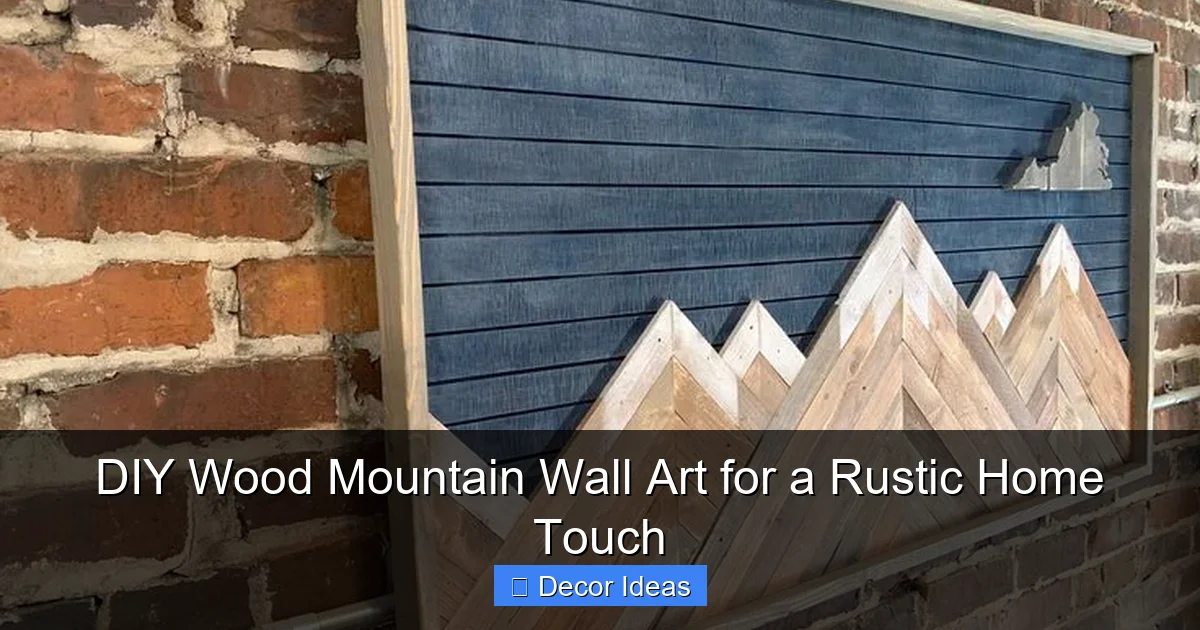
Materials and Tools You’ll Need
Visual guide about DIY Wood Mountain Wall Art for a Rustic Home Touch
Image source: i.pinimg.com
Before you start cutting and sanding, it’s important to gather the right materials and tools. The good news? You probably already have most of what you need at home or can find it at your local hardware store.
Essential Materials
- Wood: Use reclaimed wood, pine boards, or plywood. Thickness can vary, but ½” to ¾” works well for layering.
- Sandpaper: Medium (120 grit) and fine (220 grit) for smoothing edges and surfaces.
- Wood glue: For securing layers together.
- Wood stain or paint: Choose based on your desired look—natural wood tones, whitewash, or bold colors.
- Clear sealant (optional): Protects the finish and adds durability.
- Hanging hardware: D-ring hangers, sawtooth hangers, or picture wire.
Basic Tools
- Jigsaw or coping saw: For cutting mountain shapes. A jigsaw is faster, but a coping saw offers more control for detailed curves.
- Pencil and ruler: For sketching your design.
- Clamps: To hold pieces in place while glue dries.
- Drill (optional): For attaching hanging hardware.
- Safety gear: Safety glasses and a dust mask are recommended when cutting and sanding.
Optional Upgrades
If you want to take your project up a notch, consider adding LED string lights behind the mountains for a soft glow, or using different wood types (like walnut and maple) for contrasting layers. You could also incorporate laser-cut details or hand-painted accents for extra flair.
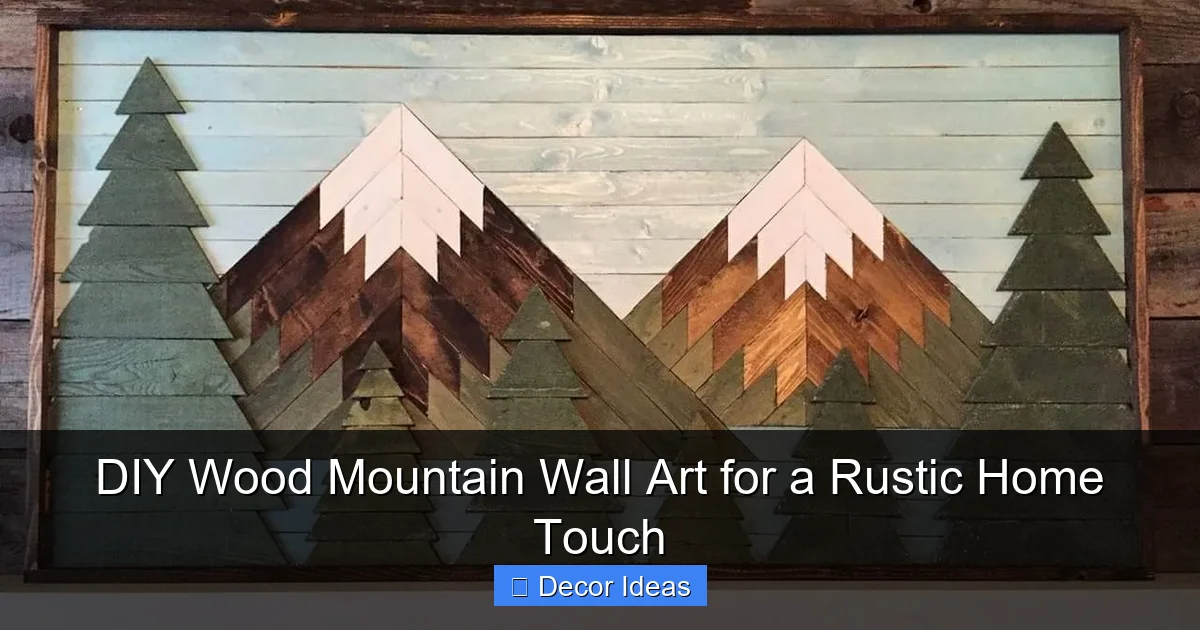
Step-by-Step Guide to Creating Your Wood Mountain Art
Visual guide about DIY Wood Mountain Wall Art for a Rustic Home Touch
Image source: i.etsystatic.com
Now that you’ve got your materials ready, it’s time to build! Follow these simple steps to create your own stunning mountain wall art.
Step 1: Design Your Mountain Range
Start by sketching your mountain design on paper. You can keep it simple with one or two peaks, or go bold with a full range. Look at photos of real mountains for inspiration—notice how the peaks vary in height and how the layers overlap. Once you’re happy with your sketch, transfer it to a piece of cardboard or thin wood to create a template. This will help you trace the shape accurately onto your wood.
Step 2: Cut the Wood Pieces
Using your template, trace the mountain shapes onto your wood. If you’re making a layered piece, trace each layer separately—background, midground, and foreground. Then, carefully cut along the lines with your jigsaw or coping saw. Take your time, especially around curves and narrow points. Remember: it’s better to cut slightly outside the line and sand down than to cut too much and ruin the shape.
Step 3: Sand the Edges
Once all pieces are cut, use medium-grit sandpaper to smooth rough edges. Then switch to fine-grit sandpaper to create a polished finish. Pay extra attention to the front edges—these will be visible once the piece is hung. Sanding also helps the wood absorb stain or paint more evenly.
Step 4: Stain or Paint
Now comes the fun part—adding color! If you want a natural look, apply a wood stain in a shade that complements your decor. Use a brush or cloth to apply evenly, then wipe off excess after a few minutes. For a painted finish, use acrylic or chalk paint. You can paint each layer a different color (like soft blues for distant mountains and warm browns for the foreground) or go monochromatic for a minimalist vibe. Let the paint or stain dry completely between coats.
Step 5: Assemble the Layers
Once everything is dry, it’s time to glue the layers together. Apply wood glue to the back of the top layer and press it onto the layer beneath. Use clamps or heavy books to hold it in place while the glue dries (usually 1–2 hours). For a 3D effect, you can add small wooden spacers between layers before gluing—this creates depth and shadow.
Step 6: Add Hanging Hardware
Finally, attach your hanging hardware to the back. D-ring hangers are sturdy and easy to install. Screw them into the top corners of the back layer, then attach picture wire between them. Make sure the wire is tight enough to hold the piece securely but loose enough to allow for easy hanging.
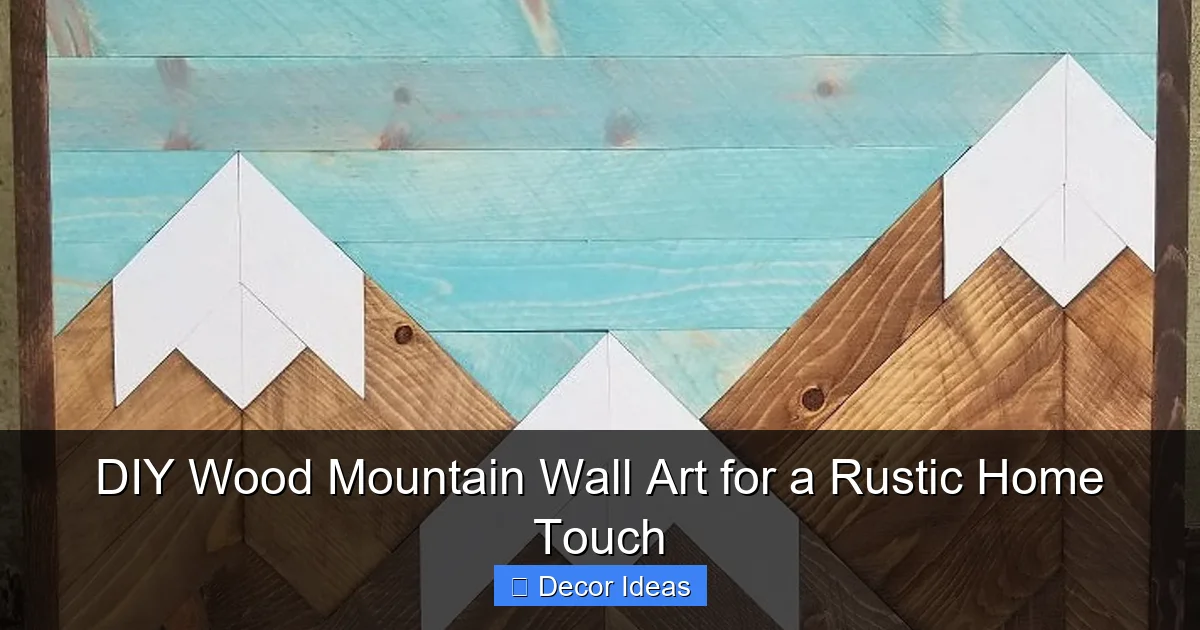
Design Ideas and Styling Tips
Visual guide about DIY Wood Mountain Wall Art for a Rustic Home Touch
Image source: i.etsystatic.com
Your DIY wood mountain wall art doesn’t have to be limited to traditional browns and grays. Here are some creative ideas to inspire your design.
Color Schemes
– Earthy Tones: Use walnut stain, sage green, and terracotta for a warm, natural look.
– Cool Neutrals: Paint layers in soft gray, white, and pale blue for a modern, serene vibe.
– Sunset Glow: Add a painted orange or pink background to mimic a mountain sunset.
– Monochrome: Paint all layers the same color (like black or white) for a bold, graphic statement.
Layering Techniques
– Overlapping Peaks: Create depth by having taller mountains in front of shorter ones.
– Asymmetrical Layout: Avoid perfect symmetry for a more organic, natural feel.
– Mixed Wood Types: Combine light and dark woods for natural contrast without paint.
Where to Hang It
– Above a sofa or bed for a calming focal point.
– In a hallway to break up long walls.
– In a home office to inspire focus and tranquility.
– As part of a gallery wall mixed with photos and prints.
Common Mistakes to Avoid
Even simple projects can go sideways if you’re not careful. Here are a few pitfalls to watch out for.
Cutting Too Fast
Rushing with the jigsaw can lead to jagged edges or broken pieces. Go slow, especially around tight curves. If a piece breaks, don’t panic—you can often sand it smooth or adjust the design.
Skipping Sanding
Rough edges not only look unfinished but can also splinter. Always sand thoroughly, even if you plan to paint. A smooth surface ensures a professional-looking finish.
Using Too Much Glue
Excess glue can seep out and ruin the look. Apply a thin, even layer and wipe away any squeeze-out immediately with a damp cloth.
Ignoring Weight Distribution
If your piece is large or has many layers, make sure the hanging hardware is secure. Test it by gently pulling on the wire before hanging.
Conclusion
DIY wood mountain wall art is more than just a decor project—it’s a way to connect with nature, express your creativity, and add a personal touch to your home. Whether you’re drawn to the rustic charm of reclaimed wood or the clean lines of a modern design, this project offers endless possibilities. It’s affordable, eco-friendly, and surprisingly simple, making it perfect for crafters of all levels.
So grab your tools, pick out some wood, and start shaping your own mountain masterpiece. With a little time and effort, you’ll have a beautiful, handmade piece that brings the quiet beauty of the outdoors into your everyday life. And who knows? Once you’ve made one, you might just want to create a whole series—each one capturing a different landscape, season, or memory.
🎥 Related Video: Creating Mountains: Geometric Wall Art Part 4 | Offcuts Transformation #woodworking #geometricart
📺 The Art of Sawdust
Hey everyone! Today’s video is part four of our ongoing geometric wall art project. We’re still working with those offcuts we sliced …
Frequently Asked Questions
How long does it take to make DIY wood mountain wall art?
Most projects take 2–4 hours, depending on complexity. Cutting and sanding take the most time, while drying between coats adds waiting time.
Can I use plywood for this project?
Yes, plywood is a great option. Just make sure it’s sanded smooth and free of major defects on the surface you’ll be displaying.
Do I need to seal the wood after painting or staining?
Sealing isn’t required, but it protects the finish from dust and moisture. Use a clear matte or satin sealant for best results.
What’s the best way to trace the mountain shape onto wood?
Create a paper or cardboard template first, then pin or tape it to the wood and trace with a pencil for accuracy.
Can I make a large wall art piece for above my bed?
Yes! Just ensure you use sturdy wood and secure hanging hardware. Consider making it in sections if it’s very wide.
Where can I find free mountain templates online?
Search for “free mountain silhouette templates” on Pinterest or design sites like Canva. Many crafters share printable patterns you can download.