DIY Yarn Wall Art Easy Craft Ideas for Home Decor
DIY yarn wall art is a fun, affordable way to add color, texture, and personality to any room. With just a few supplies and some creativity, you can craft beautiful pieces that reflect your style—from minimalist designs to boho-chic masterpieces.
Looking to refresh your walls without spending a fortune? DIY yarn wall art might just be the perfect solution. This charming craft trend blends simplicity with creativity, letting you turn ordinary yarn into eye-catching decor. Whether you’re a seasoned crafter or someone who’s never held a glue gun, yarn wall art is approachable, relaxing, and incredibly rewarding.
What makes yarn wall art so special? It’s not just about color—it’s about texture, depth, and the handmade touch that mass-produced decor often lacks. A simple bundle of yarn wrapped around a wooden hoop can transform a blank wall into a focal point. Plus, it’s a fantastic way to use up leftover skeins or experiment with bold color combinations you wouldn’t normally try. From modern geometric designs to dreamy, flowing tassels, the possibilities are endless—and best of all, they’re all within your reach.
Key Takeaways
- Yarn wall art is beginner-friendly: No advanced skills needed—just basic wrapping, gluing, or knotting techniques.
- It’s highly customizable: Choose colors, patterns, and shapes to match your home decor style.
- Uses affordable materials: Most supplies like yarn, hoops, and cardboard can be found at craft stores or reused from household items.
- Adds texture and warmth: Soft yarn creates a cozy, inviting feel that hard surfaces like metal or wood can’t match.
- Great for small spaces: Compact designs work well in apartments, dorm rooms, or narrow walls.
- Eco-friendly option: Repurpose old yarn or use sustainable fibers for a greener craft project.
- Perfect for gifts: Handmade yarn art makes a thoughtful, personal present for housewarmings or birthdays.
Quick Answers to Common Questions
What kind of yarn is best for wall art?
Acrylic yarn is great for beginners—it’s affordable, durable, and comes in many colors. Cotton offers a softer finish, while wool adds warmth and texture.
Do I need special tools to make yarn wall art?
No! Basic supplies like yarn, scissors, and an embroidery hoop are enough to get started. A hot glue gun is helpful but optional.
Can I make yarn wall art without a hoop?
Absolutely! Use cardboard, dowels, or even driftwood as bases. The shape is up to you.
How do I hang my yarn wall art safely?
Use small nails, Command hooks, or adhesive strips. Most pieces are lightweight, so they won’t damage walls.
Is yarn wall art suitable for kids to make?
Yes! With adult supervision for cutting and gluing, kids can help wrap yarn or make tassels. It’s a fun, safe craft for all ages.
📑 Table of Contents
Why Choose DIY Yarn Wall Art?
Yarn wall art has surged in popularity, and for good reason. It’s more than just a craft—it’s a creative outlet that brings warmth and personality into your home. Unlike store-bought decor, handmade pieces carry a story. Every loop, knot, and swirl reflects your time, effort, and style.
One of the biggest advantages is affordability. You don’t need expensive tools or materials. A basic kit might include yarn, a wooden embroidery hoop, scissors, and maybe some hot glue. Compare that to buying a framed print or canvas, and the savings are clear. Plus, yarn comes in every color imaginable, so you can perfectly match your existing decor or go bold with a statement piece.
Another benefit? It’s therapeutic. The repetitive motions of wrapping or knotting yarn can be surprisingly calming. Many people find it meditative, like coloring or knitting. It’s a great way to unwind after a long day while creating something beautiful.
Perfect for Any Room
Yarn wall art isn’t limited to one style or space. In the living room, a large geometric design can anchor a seating area. In the bedroom, soft pastel tassels add a dreamy, cozy vibe. Even bathrooms and entryways can benefit—try a small circular piece above a mirror or console table.
It’s also ideal for renters. Since most designs are lightweight and hang with simple hooks or adhesive strips, you won’t damage walls. That means you can personalize your space without worrying about losing your security deposit.
Essential Materials and Tools
Visual guide about DIY Yarn Wall Art Easy Craft Ideas for Home Decor
Image source: diycandy.b-cdn.net
Before you start, gather your supplies. The good news? You probably already have some of these at home.
Basic Supplies
- Yarn: Choose acrylic, cotton, or wool based on texture and durability. Acrylic is budget-friendly and comes in vibrant colors, while cotton offers a softer finish. Wool adds warmth but can be pricier.
- Embroidery hoops: Wooden hoops in various sizes (4” to 12”) are perfect for circular designs. They’re inexpensive and easy to find.
- Scissors: A sharp pair for clean cuts.
- Hot glue gun (optional): Helps secure ends or add 3D elements like tassels.
- Cardboard or foam board: Great for creating custom shapes like hearts, stars, or abstract forms.
- Measuring tape or ruler: Keeps your designs even and symmetrical.
- Command hooks or nails: For hanging your finished piece.
Optional Upgrades
Want to take it up a notch? Try adding beads, feathers, or metallic yarn for extra sparkle. Some crafters use dowels or driftwood as bases for a more organic look. You can also incorporate macramé knots for a boho twist.
Step-by-Step DIY Yarn Wall Art Projects
Visual guide about DIY Yarn Wall Art Easy Craft Ideas for Home Decor
Image source: i.pinimg.com
Ready to get crafting? Here are three beginner-friendly projects to inspire you.
Project 1: Wrapped Hoop Art
This is the most popular style—simple, stylish, and endlessly customizable.
Steps:
- Remove the inner ring of the embroidery hoop and set it aside.
- Cut a long piece of yarn (about 3–4 feet) and tie one end securely to the outer hoop.
- Begin wrapping the yarn tightly around the hoop, moving in one direction. Keep the wraps close together for a solid look.
- When you reach the end, tuck the yarn tail under a few wraps or use a dot of glue to secure it.
- Repeat with additional colors if desired, creating stripes or patterns.
- Reattach the inner hoop to hold the yarn in place.
- Hang using a nail or Command hook.
Pro Tip: Use a mix of thick and thin yarn for visual interest. Try ombre effects by blending similar shades.
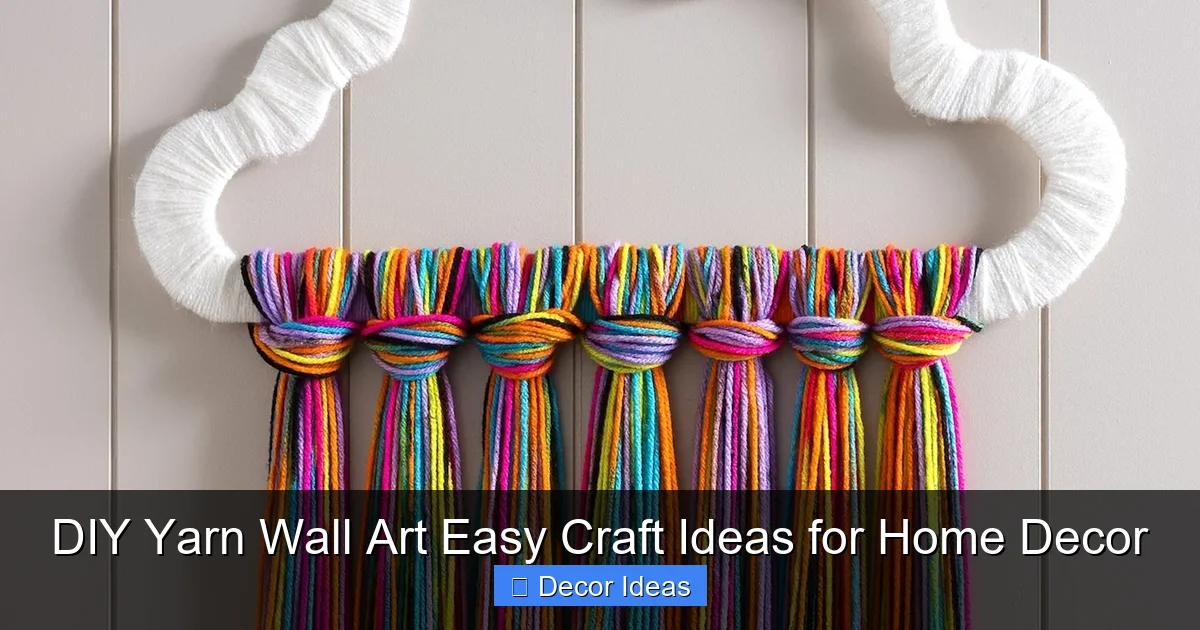
Project 2: Yarn Tassel Wall Hanging
Tassels add movement and softness—perfect for boho or modern farmhouse styles.
Steps:
- Cut a piece of cardboard about 4” wide.
- Wrap yarn around the cardboard 20–30 times (more wraps = fuller tassel).
- Slide a separate piece of yarn underneath the wrapped bundle and tie tightly in the middle.
- Cut the loops at both ends to create the tassel shape.
- Trim the ends to even them out.
- Attach tassels to a wooden dowel or hoop using the center tie strings.
- Space them evenly and hang.
Variation: Make tassels in different lengths and colors for a cascading effect.
Project 3: Geometric Yarn Canvas
For a modern look, create sharp lines and shapes using cardboard and yarn.
Steps:
- Draw a geometric pattern (like triangles or diamonds) on a piece of cardboard.
- Cut out the shape and reinforce with tape if needed.
- Use a hot glue gun to attach yarn along the edges and fill in the design.
- Layer colors or use a single hue for a minimalist vibe.
- Once dry, attach a loop of yarn to the back for hanging.
Bonus: Paint the cardboard base before adding yarn for a pop of contrast.
Tips for Success and Creativity

Visual guide about DIY Yarn Wall Art Easy Craft Ideas for Home Decor
Image source: diycandy.b-cdn.net
Even simple projects can shine with a few smart tricks.
Choose a Color Palette
Start with 2–4 complementary colors. Use online tools like Coolors.co to find harmonious combinations. Neutral tones (beige, gray, white) work well in most rooms, while bright colors make a statement.
Mix Textures
Combine smooth yarn with chunky, fluffy, or variegated strands. This adds depth and keeps the piece visually engaging.
Keep It Balanced
If your design feels too busy, simplify. Sometimes less is more. A single large hoop with one color can be just as striking as a complex pattern.
Experiment with Shapes
Don’t limit yourself to circles. Try hearts, moons, or abstract freeform designs. Use templates or freehand your ideas.
Seal Loose Ends
A tiny dot of glue on yarn tails prevents fraying and keeps your piece looking neat.
Styling Your Yarn Wall Art
Once your piece is complete, it’s time to display it.
Group for Impact
Create a gallery wall with 2–4 smaller pieces. Mix yarn art with framed photos or prints for variety.
Use as a Focal Point
Hang a large piece above a bed, sofa, or console table. It draws the eye and anchors the room.
Layer with Other Textures
Pair yarn art with woven baskets, macramé, or wooden shelves. The mix of materials adds richness to your decor.
Rotate Seasonally
Switch out colors to match the season—warm reds and oranges in fall, icy blues in winter, pastels in spring.
Eco-Friendly and Sustainable Ideas
Crafting doesn’t have to cost the earth—literally.
Repurpose Old Yarn
Check your stash for unused skeins. Even partial balls can be combined into new colorways.
Use Natural Fibers
Opt for cotton, linen, or wool when possible. They’re biodegradable and often more durable.
Upcycle Materials
Turn old picture frames, coat hangers, or cardboard boxes into bases for your art.
Donate or Swap
If you make extra, gift it or trade with fellow crafters. It’s a great way to share creativity and reduce waste.
Conclusion
DIY yarn wall art is more than a craft—it’s a joyful way to personalize your space, express your creativity, and enjoy a mindful hobby. With minimal supplies and a little imagination, you can create stunning pieces that reflect your unique style. Whether you’re wrapping a simple hoop or crafting a tassel masterpiece, the process is as rewarding as the result.
So grab that yarn, clear a little space, and let your creativity flow. Your walls—and your soul—will thank you.
🎥 Related Video: DIY Macrame Wall Hanging | DIY Boho Wall Decor | DIY Yarn Wall Hanging | DIY Aesthetic Decor
📺 Mercy Grace – Faith & Family First
Frequently Asked Questions
How long does it take to make a piece of yarn wall art?
Most simple projects take 30 minutes to 2 hours, depending on size and complexity. Larger or detailed designs may take longer.
Can I wash my yarn wall art?
It’s not recommended to wash wall art, as water can damage the yarn or cause colors to bleed. Dust gently with a dry cloth or use a can of compressed air.
Will yarn wall art attract pests?
If stored properly and kept clean, yarn art is unlikely to attract pests. Avoid using food-scented or dirty yarn, and keep the area dry.
Can I sell my DIY yarn wall art?
Yes! Many crafters sell their pieces on platforms like Etsy. Just ensure you use quality materials and price your work fairly.
What’s the best way to store unused yarn for future projects?
Keep yarn in a cool, dry place away from sunlight. Use plastic bins or yarn organizers to prevent tangling and dust buildup.
How do I fix a loose or frayed end on my yarn art?
Apply a tiny dot of clear-drying craft glue to the loose end and press it down. Let it dry completely before handling.