How to Cut Glass Mirror? [Read To The Tips & Tricks]
Learning how to cut glass mirror at home is a practical DIY skill that saves you money on custom framing and home decor projects. By gathering the right tools like a carbide-tip glass cutter and light machine oil, preparing a clean flat workspace, and following a steady scoring and snapping technique, you can achieve clean edges every time. Always prioritize safety by wearing thick gloves and protective eyewear to handle sharp glass fragments safely.
Have you ever found the perfect vintage frame at a thrift store, only to realize the mirror inside is the wrong size? Or maybe you are working on a custom home gym wall and need a specific mirror dimension that hardware stores just do not stock. Whatever your project, figuring out how to cut glass mirror can seem a bit intimidating at first. After all, glass is sharp, fragile, and famously unforgiving of mistakes.
The good news is that cutting a mirror is much easier than you might think. It does not require a room full of expensive industrial machinery. In fact, with a few affordable hand tools, a little patience, and the right technique, you can master how to cut glass mirror right on your own workbench or kitchen table. Let us walk through the process together, step by step, so you can tackle your next DIY project with total confidence.
Key Takeaways
- Right Tools: You need a quality glass cutter, cutting fluid, a straight edge, and a pair of protective gloves to get started.
- Clean Surface: Always clean your mirror thoroughly before cutting so dust and debris do not ruin your score line.
- Single Continuous Score: Press firmly and make one smooth, continuous stroke across the glass without going back over it.
- Proper Snapping: Align the score line with the edge of your table and apply gentle downward pressure to snap the mirror cleanly.
- Safety First: Glass creates tiny, sharp shards, so safety glasses and heavy work gloves are absolute must-haves.
- Edge Smoothing: Use fine-grit sandpaper or a rubbing stone to smooth out the sharp edges after your cut is complete.
Understanding How a Glass Mirror is Made
Before you dive into your first cut, it helps to understand what a mirror actually is. A standard glass mirror is simply a flat piece of glass with a reflective metallic coating on the back, usually sealed with a protective paint layer. When you learn how to cut glass mirror, you are not actually cutting the glass all the way through with a blade. Instead, you are creating a tiny fracture line in the top surface of the glass and then snapping it cleanly along that line.
The Secret is the Score
The secret to success lies in the score. When you drag a carbide-wheel glass cutter across the front surface of the glass, it creates a microscopic fissure. This fissure creates a weak point in the material. When you apply gentle pressure to either side of that line, the glass naturally wants to break right along the path you created. If your score is weak, jagged, or inconsistent, the mirror will not snap the way you want it to.
Front Side vs. Back Side
A common question beginners ask is whether to cut from the front or the back of the mirror. You should always score the front glass side, not the back reflective coating side. If you try to cut through the backing, the soft paint and metallic layers will cushion the cutter wheel, preventing you from making a clean score on the glass itself. Always keep the shiny reflective side facing down against your work surface.
Gathering Your Tools and Materials
Having the right gear makes all the difference when learning how to cut glass mirror. You do not need to spend a fortune, but using cheap or dull tools will only lead to frustration and ruined materials. Here is your essential checklist:
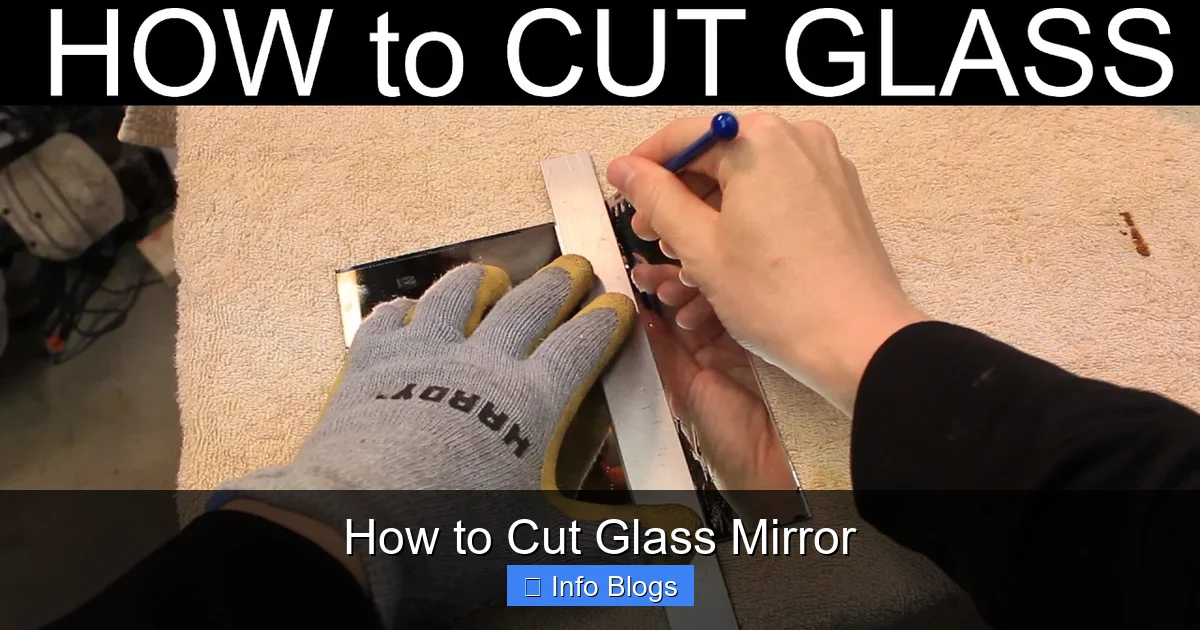
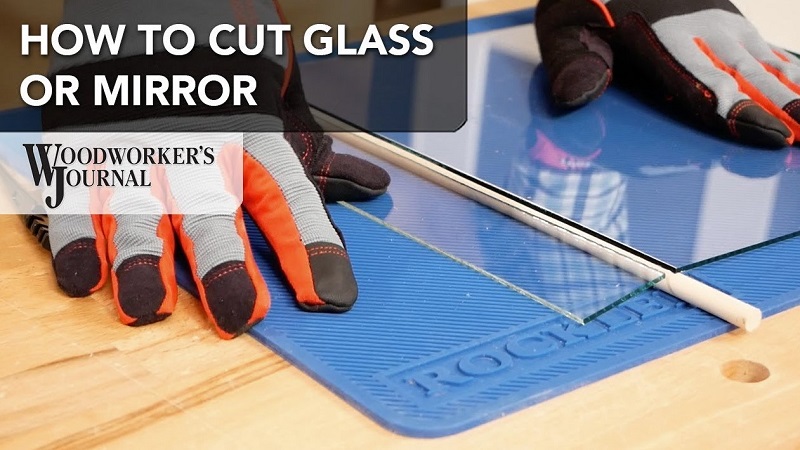
Visual guide about How to Cut Glass Mirror
Image source: i.ytimg.com
- Glass Cutter: A pistol-grip or pencil-style cutter with a carbide steel wheel.
- Cutting Fluid: Light machine oil, kerosene, or even sewing machine oil to lubricate the cutter.
- Straight Edge: A sturdy metal ruler or a piece of flat wood to guide your cutter.
- Measuring Tape: For accurate marking before you make your cuts.
- Marker: A fine-tip permanent marker to mark your glass dimensions.
- Safety Gear: Heavy-duty work gloves and safety glasses.
- Smoothing Tool: Fine-grit wet/dry sandpaper or a carborundum stone to smooth edges.
Choosing the Right Glass Cutter
Pencil-style cutters are cheap and widely available, but pistol-grip cutters are often much easier on your hands, especially if you have arthritis or weak grip strength. Look for a self-oiling cutter if possible. These have a small reservoir inside the handle that feeds oil directly to the cutting wheel, ensuring a smooth, friction-free score every single time.
Preparing Your Workspace and Mirror
Preparation is the secret weapon of any successful DIYer. When you are figuring out how to cut glass mirror safely, your workspace plays a huge role. You need a stable, completely flat surface that is large enough to support the entire sheet of glass.
Setting Up a Clean Surface
Clear off your workbench or table completely. Lay down a clean, thick blanket or a piece of cardboard over the surface. This cushions the back of the mirror and prevents the reflective coating from getting scratched while you work. Any stray grain of sand or tiny piece of debris trapped under the glass can cause the mirror to crack unpredictably when you apply pressure later, so a clean surface is non-negotiable.
Measuring and Marking Twice
Measure your desired dimensions carefully using your tape measure. Use your fine-tip permanent marker to make small dots at both ends of your intended cut line. Align your metal straight edge with your marks. Remember to account for the width of the cutter head itself; usually, the cutting wheel sits about one to two millimeters inside the edge of the metal ruler. Test your placement before making any permanent moves.
Mastering the Scoring Technique
This is the moment of truth. Mastering the scoring technique is the most important part of learning how to cut glass mirror. Take a deep breath, relax your hand, and remember that slow and steady wins the race here.
Applying Cutting Oil
Dip your glass cutter into your cutting fluid, or let a few drops run onto the mirror along your planned cut line. The oil lubricates the wheel, reduces friction, and keeps tiny glass dust particles from flying into the air. It also helps the wheel create a much cleaner, deeper fracture line.
The Single Continuous Stroke
Hold the cutter like a pencil or grip your pistol-style tool firmly. Place the wheel at the far edge of the mirror, pull it toward you in one smooth, continuous, even stroke. Do not press down with all your body weight; moderate, steady pressure is all you need. You should hear a distinct scratching or zipping sound as the wheel travels across the glass.
Crucial Tip: Never go over your score line a second time. Backtracking dulls the cutter wheel and almost always results in a jagged, ruined break.
Snapping the Glass Safely
Once your score line is complete, it is time to separate the glass. This step always feels a little nerve-wracking the first few times you try it, but with the right technique, it happens in a split second.
Using the Table Edge
Slide the mirror so that your score line aligns directly with the edge of your workbench or table. The larger piece of the mirror should be fully supported on the table, while the waste piece hangs off the edge in empty space. Place your metal straight edge right along the table edge on top of the mirror to hold it down securely.
The Quick Snap Motion
Put on your heavy work gloves and safety glasses. Place your hands on the hanging waste piece of the mirror. With a quick, firm, downward motion, snap the waste piece off. Think of it like snapping a dry twig. It should break cleanly along the score line with a satisfying pop.
If you are working with a very narrow strip of glass that is too small for your hands to grip, use a pair of running pliers or glass-breaking pliers to grab the edge and snap it cleanly away.
Finishing Edges and Cleaning Up
Congratulations, you have successfully cut your mirror! But your job is not quite finished yet. Freshly cut glass edges are razor-sharp and can cause nasty cuts if you are not careful.
Smoothing Sharp Edges
Take your fine-grit wet/dry sandpaper or carborundum stone and gently run it along the cut edges of the mirror. If you are using sandpaper, wet it slightly to keep glass dust down. A few gentle passes at a 45-degree angle will take the bite right out of the glass edge, making it safe to handle and install into your frame.
Cleaning Up Debris
Tiny glass splinters are nearly invisible and love to stick to clothing and skin. Carefully wipe down your workspace with a damp paper towel, and use a vacuum cleaner to sweep the floor around your work area. Toss any waste glass into a thick cardboard box or wrap it in layers of newspaper before putting it in the trash bin to protect your local waste collectors.
By taking your time and following these steps carefully, you will find that learning how to cut glass mirror is a rewarding skill that opens up endless possibilities for home decor, repairs, and custom craft projects.
Frequently Asked Questions
Can I cut a mirror without using cutting oil?
Technically yes, but it is not recommended. Cutting oil lubricates the wheel, reduces friction, and helps create a much cleaner, smoother score line that snaps easily.
What kind of tool do I need to cut a mirror?
You need a glass cutter featuring a small carbide steel wheel, which you can find at any local hardware store for a very affordable price.
Why did my mirror shatter instead of breaking along the line?
Mirrors usually shatter if you press down too hard, try to go over the score line a second time, or if there is a tiny piece of debris underneath the glass while you snap it.
Should I cut the mirror from the front or the back?
Always cut from the front glass side. Scoring the back reflective coating will cushion the cutter wheel and prevent you from making a proper fracture in the glass.
How do I make curved cuts on a mirror?
Curved cuts require specialized glass-cutting oil, a pistol-grip cutter, and glass-breaking pliers to nip away small pieces of excess glass gradually. It is an advanced technique best left for later projects.
Is it safe to cut mirrors at home?
Yes, it is completely safe as long as you wear safety glasses and thick work gloves, and handle all glass fragments with care and caution.