How to Fix a Cracked Mirror [Read To Learn The Easy Ways]
Learning how to fix a cracked mirror is a cost-effective DIY project that saves you money on replacement costs. With the right glass repair kit, some patience, and a few basic household supplies, you can make minor surface damage nearly invisible. This comprehensive guide walks you through the entire restoration process from start to finish.
There is nothing quite as frustrating as walking into your bathroom or bedroom and discovering a nasty fracture in your favorite looking glass. Whether it was a rogue hairbrush, an overly enthusiastic pet, or just bad luck, that sudden line running across your reflection can ruin the aesthetic of an entire room. Luckily, you do not have to throw it in the trash just yet. You can learn how to fix a cracked mirror with basic tools and a little bit of patience.
Before you rush to buy a brand-new decor piece, take a deep breath. Fixing a glass surface sounds intimidating, but the actual process is quite straightforward. Think of it just like filling a tiny pothole in a driveway. By using a clear glass repair resin, you can fill the gap, restore the structural strength, and significantly reduce the visibility of the blemish. Let us dive into everything you need to know about how to fix a cracked mirror right in your own home.
Key Takeaways
- Assess the damage: Only surface cracks and minor chips are safe to repair at home. Deep fractures require complete mirror replacement.
- Gather the right tools: A specialized glass repair resin and curing strips are essential for a clear, strong fix.
- Clean thoroughly: Dirt, dust, and old oils must be removed with rubbing alcohol so the resin can bond properly.
- Apply resin with care: Follow kit instructions carefully to fill the crack completely without creating messy air bubbles.
- Cure in sunlight: Most modern UV resins require direct sunlight or a UV light source to harden completely.
- Scrape excess safely: Use a razor blade at a flat angle to remove hardened resin without scratching the mirror surface.
- Know when to replace: Shattered glass or cracks spreading across safety-backed mirrors are safety hazards that cannot be safely mended.
Understanding Mirror Damage and Assessing Safety
The very first step in tackling this project is taking a good, hard look at the damage. Not every piece of broken glass is a good candidate for a DIY rescue mission. Knowing your limits here will save you a lot of time, frustration, and potential injury.
Surface Cracks vs. Deep Fractures
You need to determine if the damage goes all the way through the glass or if it is just a superficial scratch. Run your fingernail gently across the line. If your nail catches firmly, you have a physical crack. If the crack is thin, linear, and only affects the front layer, you are in a great position to learn how to fix a cracked mirror successfully.
However, if the glass is shattered into multiple pieces, has chunks missing, or features a massive spiderweb pattern spreading across the entire frame, step away. In these cases, the structural integrity is completely gone. Trying to glue shattered glass back together is dangerous and rarely looks good. When in doubt, safety always comes first, and tossing a dangerous glass hazard is better than risking a nasty cut.
Gathering Your Repair Supplies
Once you decide the item is safe to salvage, you need to collect your gear. A standard automotive windshield repair kit is usually your best friend here. These kits are designed to fill tiny glass fissures with a specialized UV-activated resin that dries completely clear.
Along with your kit, grab a bottle of rubbing alcohol, a clean microfiber cloth, a razor blade, and a pair of protective gloves. Safety glasses are also a smart choice when working with broken glass. Having everything laid out on a stable, flat workbench will make the whole process go much smoother.
Preparing the Surface for Repair
Preparation is the secret weapon of any successful DIY project. If you skip this phase, your repair resin will not bond correctly, and the crack will become visible again within a few days. Take your time here to ensure a professional-grade finish.
Deep Cleaning the Glass
Start by putting on your safety gloves. Use your microfiber cloth and rubbing alcohol to clean the area surrounding the damage thoroughly. You want to remove all traces of dust, hairspray, makeup, and skin oils.
Any trapped debris inside the fracture line will turn cloudy once you apply the resin. Take a dry cotton swab to wick away any moisture lingering inside the groove. The glass must be completely dry and pristine before you move on to the next step.
Setting Up Your Workspace
Lay the looking glass flat on a sturdy table covered with a soft blanket or towel. This prevents the back of the frame from getting scratched while you apply pressure to the front. Make sure your room has good lighting so you can see the tiny fissure clearly.
If the piece is mounted permanently to a wall and cannot be taken down easily, you can still perform the fix in place. Just tape a piece of cardboard underneath the area to catch any potential drips of liquid resin.
Applying the Repair Resin
This is the main event. Applying the resin takes a steady hand and a calm demeanor. If you rush this part, you might trap air bubbles inside the groove, which ruins the illusion of a seamless repair.
Injecting the Clear Liquid
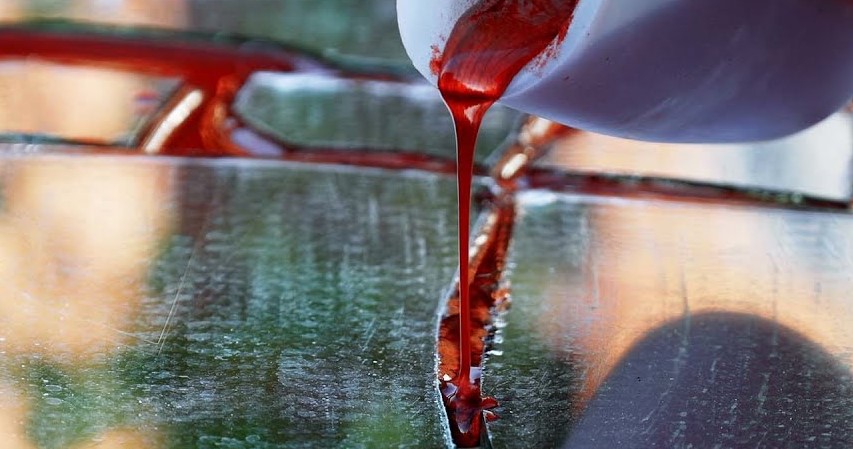
Most repair kits come with a small syringe or a squeeze bottle filled with clear acrylic resin. Position the tip of the applicator directly over the start of the line. Gently squeeze a small bead of resin into the gap.
Capillary action will naturally pull the liquid deep into the fissure. Watch closely as the liquid flows along the path of the damage. If a section looks dry, add just a tiny drop more until the entire channel is completely saturated with the clear liquid.
Pressing and Smoothing
Once the liquid is inside the groove, place a clear curing film—usually provided in your kit—directly over the wet resin. Use your fingernail or a plastic card to smooth the plastic film down gently. This squeezes out excess liquid and prevents oxygen from interfering with the curing process.
Do not press down too hard, or you will force all the resin back out of the groove. You just want a nice, flat, protective layer sealing the top of the fracture.
Curing and Hardening the Resin
Now that the liquid is in place, you have to give it time to transform into a hard, glass-like solid. This chemical reaction is usually triggered by ultraviolet light.
Using Natural Sunlight
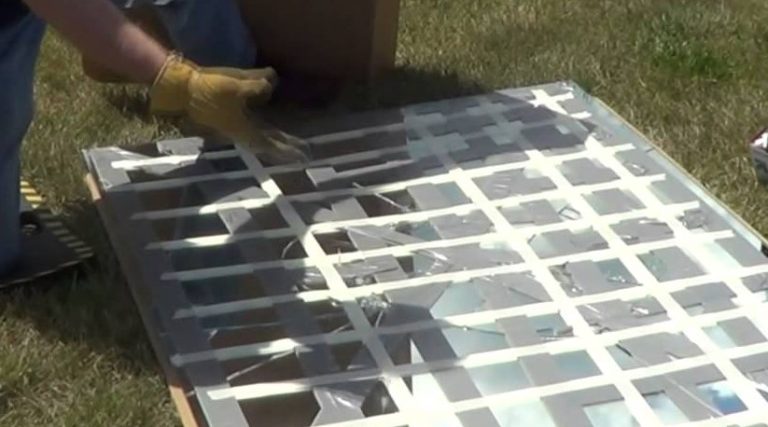
The easiest way to cure the resin is to take your project outside into direct, bright sunlight. UV rays act as the ultimate catalyst for this chemical reaction. Leave the piece sitting in the sun for about fifteen to thirty minutes.
If it is a cloudy day or you are working indoors at night, you can buy a small, inexpensive UV flashlight online or at a local hardware store. Hold the flashlight a couple of inches above the curing film for a few minutes until the resin turns completely solid.
Removing the Curing Strip
Once the time has passed, carefully peel back the plastic curing strip. Underneath, you should find a hard, raised bump of dried resin sitting right over the old blemish. Do not panic if it looks slightly bumpy; that is completely normal at this stage of the process.
Give the resin a gentle tap with your fingernail. It should feel completely hard and smooth to the touch, resembling tough plastic or hardened glass.
Finishing Touches and Polishing
The hard work is behind you, but this final step is what separates an amateur attempt from a professional-looking restoration. You need to get rid of that excess bump of resin.
Scraping Away Excess Resin
Take your razor blade and hold it at a flat, ninety-degree angle to the glass. Very gently, use the edge of the blade to scrape back and forth across the hardened resin bump. Keep the blade completely flat so you do not accidentally gouge the surrounding glass.
You will see tiny shavings of resin flake away as you scrape. Continue this gentle scraping motion until the hardened resin is flush and level with the rest of the surface.
Buffing to a Mirror Shine
Now, grab a clean glass cleaner and your microfiber cloth. Spray the entire surface and wipe it down vigorously. The razor blade might leave a slight haze on the immediate repair spot, so a good glass polish or standard glass cleaner will bring back the crystal-clear shine.
Step back and take a look at your reflection. The crack should now be barely noticeable, appearing only as a faint hairline trace if the light hits it at a very specific angle. You have successfully learned how to fix a cracked mirror!
By taking a proactive approach rather than throwing your broken items away, you save money and reduce household waste. With a little bit of care, your restored reflection will look as good as new for years to come.
Frequently Asked Questions
Can I use super glue instead of a specialized glass repair kit?
No, standard super glue dries cloudy and lacks the optical clarity needed for glass restoration. A specialized UV resin cures completely clear and matches the refractive index of glass, making the damage far less visible.
Will the repair make the mirror look completely brand new?
While the repair restores structural strength and makes the damage hard to spot, it will rarely disappear entirely. You might still see a very faint outline if you look at it from a close distance under direct light.
Is it safe to fix a crack on a bathroom vanity mirror?
Yes, as long as the damage is a simple surface fracture and not completely shattered. Just make sure the area is completely dry from steam and humidity before you apply the resin.
How long does the entire repair process take?
The hands-on work takes about fifteen to twenty minutes. However, you also need to factor in the curing time under UV light, which usually adds another twenty to thirty minutes.
What should I do if the resin does not harden properly?
If the resin remains sticky after sitting in the sun, your UV light source may not have been strong enough. Try using a dedicated UV curing flashlight or leave the project in direct sunlight for an additional fifteen minutes.
Can I fix a chipped corner instead of a crack?
Yes, many glass repair kits also work well for filling small chips and missing edge pieces. You may need to use a piece of tape to act as a temporary dam so the liquid resin stays in place while it cures.