DIY living room wall art ideas for a stylish space
Looking to refresh your living room without breaking the bank? DIY living room wall art is a fun, personal, and affordable way to add style and personality to your space. From painted canvases to repurposed materials, these creative projects let you express your taste while making a bold design statement.
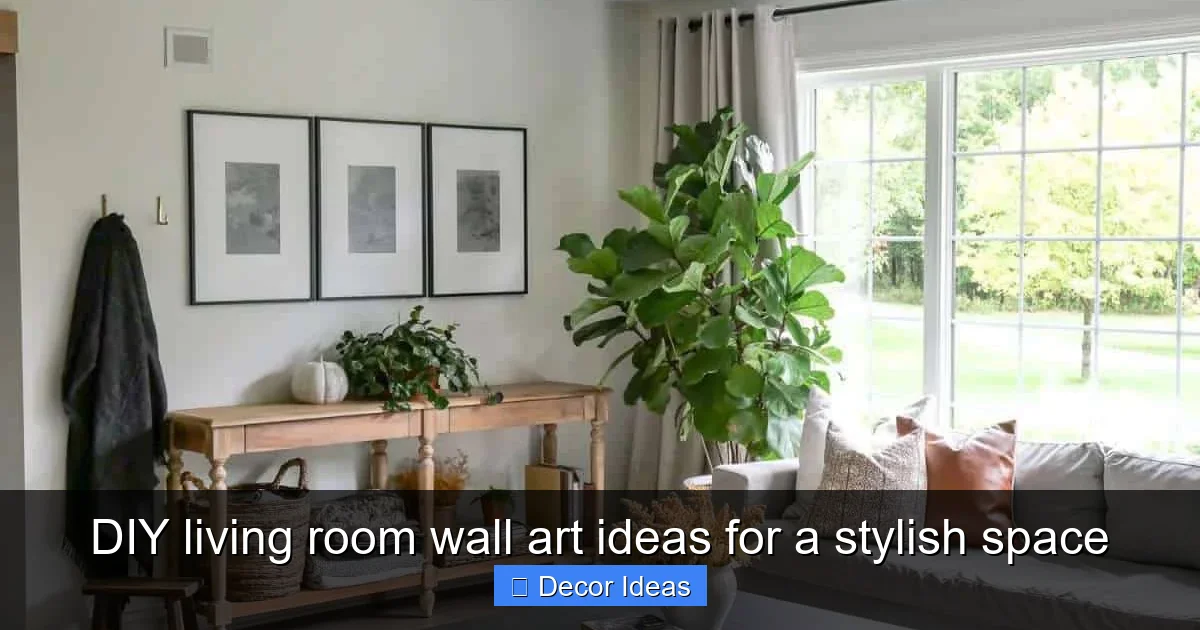
Your living room is more than just a place to relax—it’s the heart of your home, where memories are made and guests are welcomed. But let’s be honest: blank walls can make even the coziest space feel incomplete. That’s where DIY living room wall art comes in. Not only does it add visual interest, but it also lets you infuse your personality into every corner of the room.
The best part? You don’t need to be an artist or spend a fortune to create stunning wall decor. With a little creativity, some basic supplies, and a weekend afternoon, you can transform your living room into a stylish, gallery-worthy space. Whether you love bold abstract designs, nature-inspired prints, or minimalist geometric patterns, there’s a DIY project that fits your vibe.
In this guide, we’ll walk you through a variety of easy, budget-friendly DIY living room wall art ideas. From painted canvases to upcycled materials, these projects are designed to inspire and empower you to take control of your home’s aesthetic. So grab your paintbrushes, gather your materials, and let’s get crafting!
Key Takeaways
- Personalize your space: DIY wall art reflects your unique style and tells your story through colors, textures, and themes.
- Save money: Handmade art costs far less than store-bought pieces, especially when using recycled or inexpensive materials.
- Easy to customize: Adjust sizes, colors, and designs to perfectly match your living room’s decor and layout.
- Eco-friendly options: Upcycle old frames, fabric, or wood to create sustainable art that’s kind to the planet.
- Boost creativity: Crafting your own art is a relaxing, rewarding hobby that enhances your home and well-being.
- Create a gallery wall: Combine multiple DIY pieces for a dynamic, gallery-style look that draws the eye.
- Perfect for any skill level: Whether you’re a beginner or a seasoned crafter, there’s a DIY wall art project for you.
Quick Answers to Common Questions
What materials do I need for DIY wall art?
Basic supplies include canvases, acrylic paints, brushes, fabric, frames, wood slices, glue, and scissors. Many projects use recycled items like old books, picture frames, or fabric scraps.
Can I make DIY wall art if I’m not artistic?
Absolutely! Many DIY projects, like paint pouring, stenciling, or fabric hangings, don’t require drawing skills. Focus on color, texture, and arrangement instead of precision.
How do I choose colors for my wall art?
Match your art to your living room’s color scheme. Use a color wheel to find complementary or analogous colors. Neutral backgrounds work well with bold art, and vice versa.
What’s the best way to hang heavy wall art?
Use wall anchors, toggle bolts, or sturdy picture hooks. For very heavy pieces, locate wall studs and screw directly into them for maximum support.
How often should I update my wall art?
It’s up to you! Some people change art seasonally, while others keep the same pieces for years. Rotate art when you want a fresh look or after completing a new DIY project.
📑 Table of Contents
1. Painted Canvas Art: Simple Yet Stunning
One of the most popular and accessible DIY wall art ideas is creating your own painted canvas. You don’t need to be a professional painter—just a willingness to experiment with color and texture.
Abstract Paint Pouring
Abstract paint pouring is a mesmerizing technique that produces beautiful, unpredictable patterns. All you need are acrylic paints, pouring medium, cups, and a canvas. Mix your paints with the medium, layer them in a cup, and pour onto the canvas. Tilt the canvas to spread the paint, and watch as the colors blend into organic swirls and cells. This method works especially well in modern or bohemian living rooms.
Geometric Shapes and Lines
If you prefer clean, structured designs, try painting geometric shapes. Use painter’s tape to create crisp lines and sharp angles. Choose a color palette that complements your furniture—think soft neutrals, bold primaries, or moody jewel tones. A simple black-and-white triangle design or a rainbow of overlapping rectangles can make a powerful statement above your sofa.
Nature-Inspired Murals
Bring the outdoors in with a hand-painted nature scene. You don’t need to paint a full forest—just a few eucalyptus branches, a mountain silhouette, or a single blooming flower can add serenity to your space. Use stencils if freehand drawing feels intimidating. This style pairs beautifully with earthy tones and natural textures like jute or wood.
2. Fabric and Textile Wall Hangings
Fabric-based wall art is soft, textural, and surprisingly easy to make. It’s perfect for adding warmth and dimension to your living room.
Macramé Wall Hangings
Macramé is having a major comeback, and for good reason. These knotted textile pieces add boho charm and a handmade feel. You can find beginner-friendly macramé kits online or follow free tutorials to create simple designs using cotton cord. Hang a large piece above your TV or a smaller one beside a window for a cozy touch.
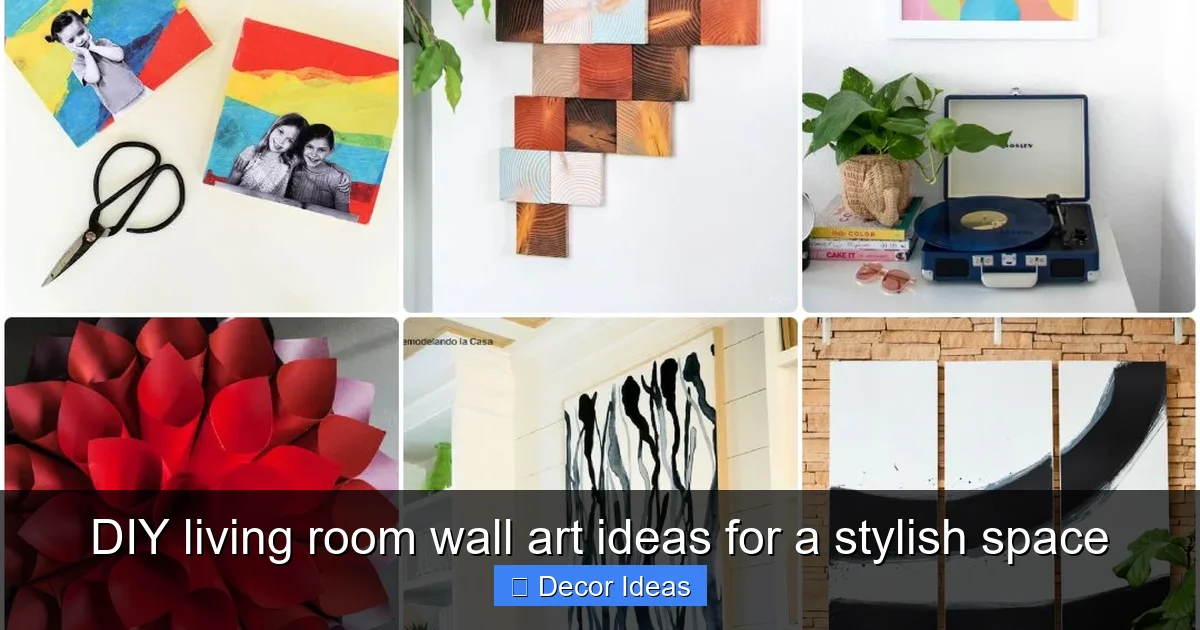
Visual guide about DIY living room wall art ideas for a stylish space
Image source: i.pinimg.com
Framed Fabric Art
Got a beautiful piece of fabric or an old scarf you love? Turn it into wall art by stretching it over a canvas or framing it in a shadow box. Choose fabrics with bold patterns, embroidery, or interesting textures. This method works great for adding color without overwhelming the room.
Tapestry and Quilt Displays
If you have a vintage quilt or a colorful tapestry, don’t hide it in a closet. Hang it on the wall using a wooden dowel or curtain rod. This not only preserves the fabric but also creates a focal point. It’s a great way to honor family heirlooms or showcase travel souvenirs.
3. Repurposed and Upcycled Materials
Sustainability meets style when you turn everyday items into unique wall art. Upcycling not only reduces waste but also gives your living room a one-of-a-kind look.
Old Picture Frames as Art
Instead of throwing away broken or outdated picture frames, repurpose them into wall art. Remove the glass and backing, paint the frame in a fresh color, and hang it as-is for a minimalist look. Or, fill the frame with pressed flowers, magazine cutouts, or even a piece of painted wood. Group several frames together for a vintage-inspired gallery wall.
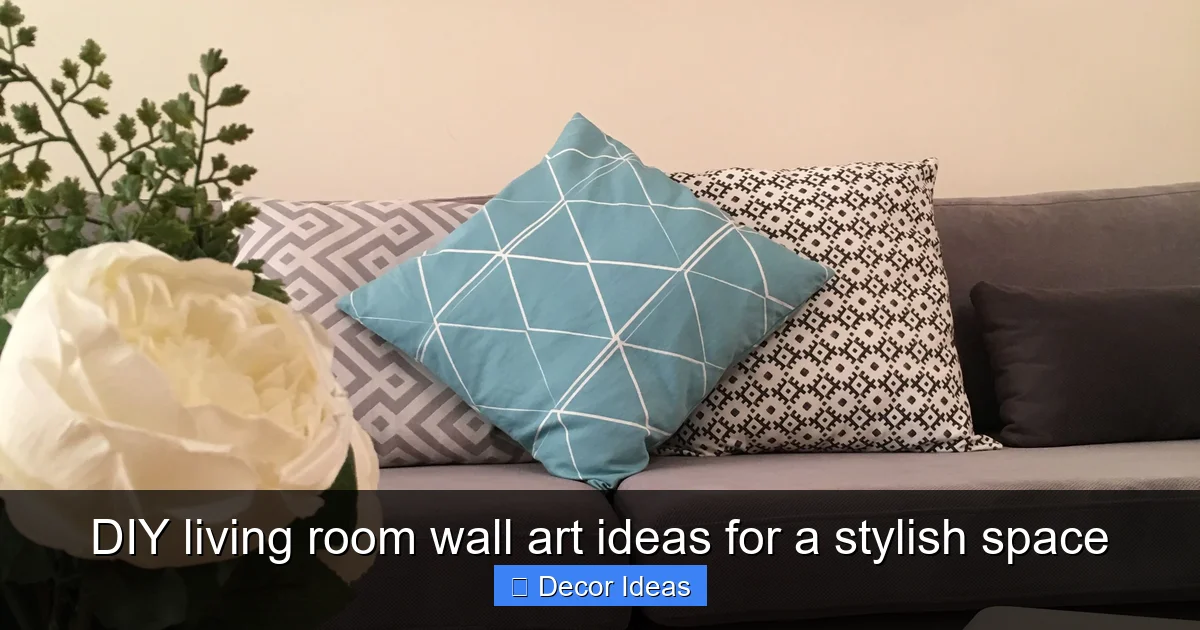
Visual guide about DIY living room wall art ideas for a stylish space
Image source: graceinmyspace.com
Wood Slice Art
Wood slices from fallen branches or craft stores make beautiful natural canvases. Sand them smooth, then paint or burn designs onto the surface. You can create mountain ranges, animals, or abstract patterns. Seal with a clear coat to protect the wood. These pieces add rustic charm and work well in farmhouse or Scandinavian-style living rooms.
Book Page Collages
Old books, sheet music, or maps can be transformed into stunning collages. Cut out interesting words, images, or patterns and arrange them on a canvas or cardboard backing. Seal with Mod Podge for a finished look. This idea is perfect for literary lovers or travelers who want to showcase their journeys.
4. Gallery Walls: Curate Your Own Collection
A gallery wall is a curated collection of art, photos, and objects that tells a story. It’s one of the most effective ways to fill a large wall and create visual interest.
Mixing Art and Personal Photos
Combine your DIY paintings with family photos, postcards, and prints. Use a consistent color scheme or frame style to unify the look. For example, choose all black frames or stick to a monochromatic palette. Arrange the pieces on the floor first to experiment with layouts before hanging.
Visual guide about DIY living room wall art ideas for a stylish space
Image source: craftriver.com
Symmetrical vs. Asymmetrical Layouts
Symmetrical layouts are neat and balanced—perfect for traditional or formal living rooms. Asymmetrical arrangements feel more relaxed and modern. Try a grid pattern for a clean look or a staggered cluster for a dynamic vibe. Use washi tape to mark positions on the wall before hammering nails.
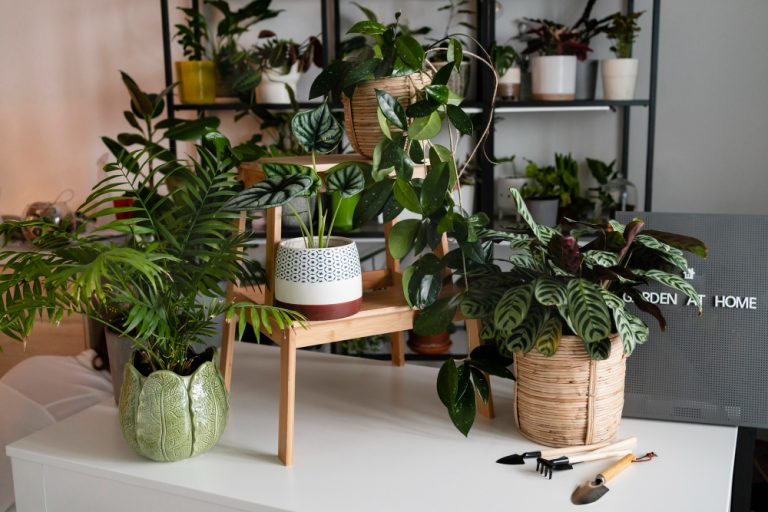
Incorporating 3D Elements
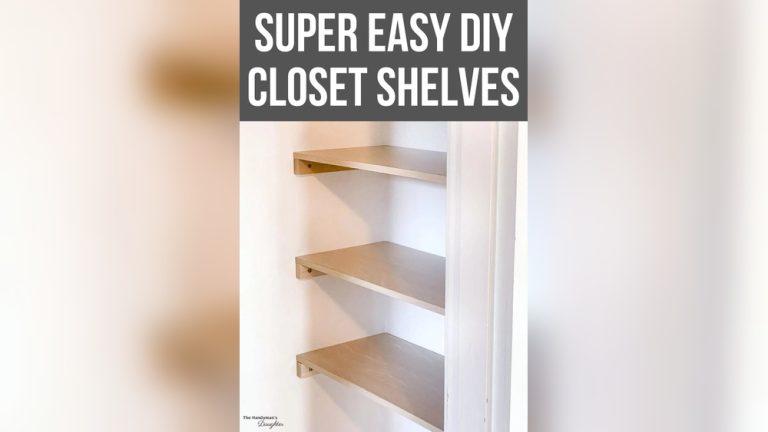
Don’t limit yourself to flat art. Add depth by including small shelves, mirrors, or hanging plants. A round mirror surrounded by framed photos creates a focal point, while a floating shelf with mini sculptures and candles adds texture and function.
5. DIY Prints and Typography
Sometimes, a powerful message or a beautiful quote is all you need to elevate your space. DIY prints are simple to make and highly customizable.
Hand-Lettered Quotes
Use a brush pen or calligraphy marker to write an inspiring quote on watercolor paper or cardstock. Choose words that resonate with you—something about home, love, or creativity. Frame it in a simple black or white frame for a clean, modern look.
Digital Prints You Can Make at Home
Design your own artwork using free tools like Canva or Adobe Express. Create abstract patterns, minimalist line drawings, or personalized quotes. Print them on high-quality paper and frame them. This method lets you match your art perfectly to your color scheme.
Stenciled Wall Art
Use stencils and spray paint or acrylics to create bold typography or symbols directly on the wall. This works best in areas with blank space, like above a console table or beside a bookshelf. Just make sure to use low-tack painter’s tape to avoid damaging the paint.
6. Seasonal and Themed DIY Art
Keep your living room fresh by rotating your wall art with the seasons or holidays. This keeps your space feeling current and festive.
Holiday-Themed Pieces
Create simple art for Christmas, Halloween, or Easter using seasonal colors and symbols. For example, paint a canvas with a snowy landscape for winter or use orange and black for a spooky fall vibe. Store them in labeled bins so you can easily switch them out.
Nature-Based Seasonal Art
Use natural materials like pinecones, dried flowers, or leaves to make seasonal wreaths or framed arrangements. In spring, display pressed cherry blossoms; in autumn, create a leaf collage with warm tones. These pieces bring the changing seasons indoors.
Rotating Art Displays
Install a picture ledge or use removable adhesive hooks to make swapping art easy. This way, you can update your living room look without nails or damage. It’s a great way to showcase new DIY projects or highlight different themes throughout the year.
Tips for Hanging and Arranging DIY Wall Art
Creating the art is only half the battle—how you display it matters just as much.
Measure and Plan
Before you start hammering, measure your wall and the art pieces. Use painter’s tape to outline where each piece will go. This helps you visualize the final look and avoid mistakes.
Eye-Level Placement
Hang art so the center is at eye level—about 57 to 60 inches from the floor. This is the standard for galleries and museums and ensures your pieces are seen and appreciated.
Use the Right Hardware
Choose appropriate hooks, nails, or adhesive strips based on the weight of your art. Heavy frames need sturdy support, while lightweight pieces can use 3M Command Strips for a damage-free option.
Balance and Spacing
Keep consistent spacing between pieces—usually 2 to 3 inches. Balance large pieces with smaller ones to create harmony. If you’re unsure, lay everything out on the floor first.
Your living room should feel like a reflection of you—cozy, creative, and full of life. With these DIY living room wall art ideas, you have the tools to make that happen. Whether you’re painting a canvas, weaving macramé, or framing a favorite quote, every piece you create adds a personal touch that store-bought art simply can’t match.
The beauty of DIY is that there’s no right or wrong way to do it. Experiment, have fun, and don’t be afraid to make mistakes. Some of the best art comes from happy accidents. And remember, your living room doesn’t need to be perfect—it just needs to feel like home.
So go ahead, pick a project that speaks to you, and start creating. Your walls are waiting.
🎥 Related Video: DIY OVERSIZED WALL ART from a Shower Curtain!!
📺 DIY Dream Home with Cara Newhart
Frequently Asked Questions
Is DIY wall art cheaper than buying art?
Yes, DIY wall art is typically much more affordable. You can create beautiful pieces using inexpensive or recycled materials, saving money while adding personal value.
Can I sell my DIY wall art?
Absolutely! Many crafters sell their handmade art online through platforms like Etsy or at local markets. Just make sure to price your work fairly based on time and materials.
What’s the easiest DIY wall art project for beginners?
Framed fabric art or painted geometric canvases are great for beginners. They require minimal tools and allow for creative freedom without complex techniques.
How do I protect my DIY wall art?
Use sealants like Mod Podge or acrylic varnish for painted pieces. For fabric, avoid direct sunlight to prevent fading. Store seasonal art in acid-free boxes.
Can I make wall art without nails or damage?
Yes! Use removable adhesive hooks, 3M Command Strips, or picture ledges. These options are ideal for renters or those who want flexibility.
What size should my wall art be?
Aim for art that fills about two-thirds to three-quarters of the wall space above furniture. Large walls can handle big statement pieces, while smaller areas work better with grouped smaller art.